
LVDS-MIPI Configuration
Once the board has booted with the LVDS camera connected, follow the steps below to configure the camera interface.
Download Configuration Folder
Note
Download
Configuration folderfrom the Drivers tab on the AstrOptix Orin Super Carrier Board product page.
Step 1: Open Terminal on the Developer Kit
- Press
Ctrl + Alt + T
Step 2: Extract Configuration folder on Dev Kit
unzip ~/Downloads/OPPILA_ASTROPTIX_L4T_36.5.0_INTEGRATION_LM.zip -d OPPILA_ASTROPTIX_L4T_36.5.0_INTEGRATION_LMConfiguration folder contains :
Step 3: Move the downloaded tegra234-p3767-camera-p3768-imx219-C.dtbo file to configuration folder
Load Configuration
Step 4: Navigate to Configuration folder
cd ~/OPPILA_ASTROPTIX_L4T_36.5.0_INTEGRATION_LMStep 5: Grant executable permissions to files
sudo chmod +x config.shStep 6: Execute config.sh script
Execute the config script using the following command.
sudo sh config.shThis script file does the following steps:
- Loads the kernel and configuration modules.
- Loads Device Tree.
Configure Device Tree Overlay
Note
This is a one-time configuration required after each new flash. It is not required on every boot.
Step 7: Open Terminal on the Developer Kit
- Press
Ctrl + Alt + T
Step 8: Run the Jetson-IO Configuration Tool
sudo /opt/nvidia/jetson-io/jetson-io.pyStep 9: Navigate to Configuration Menu
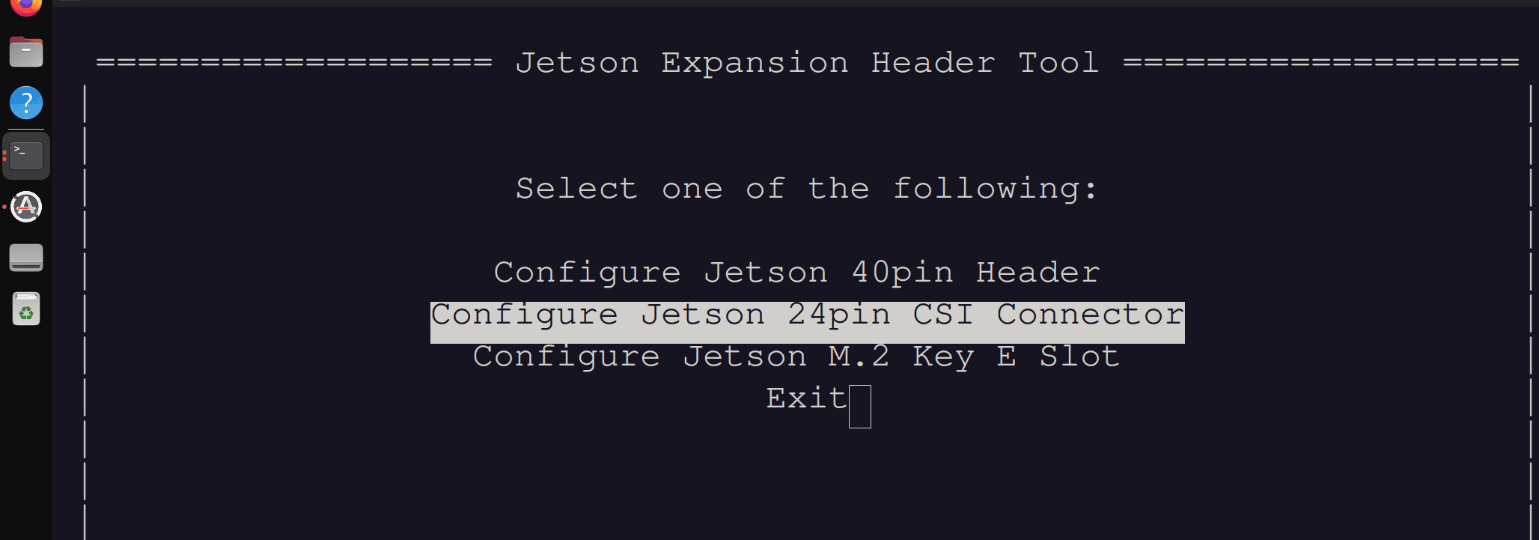
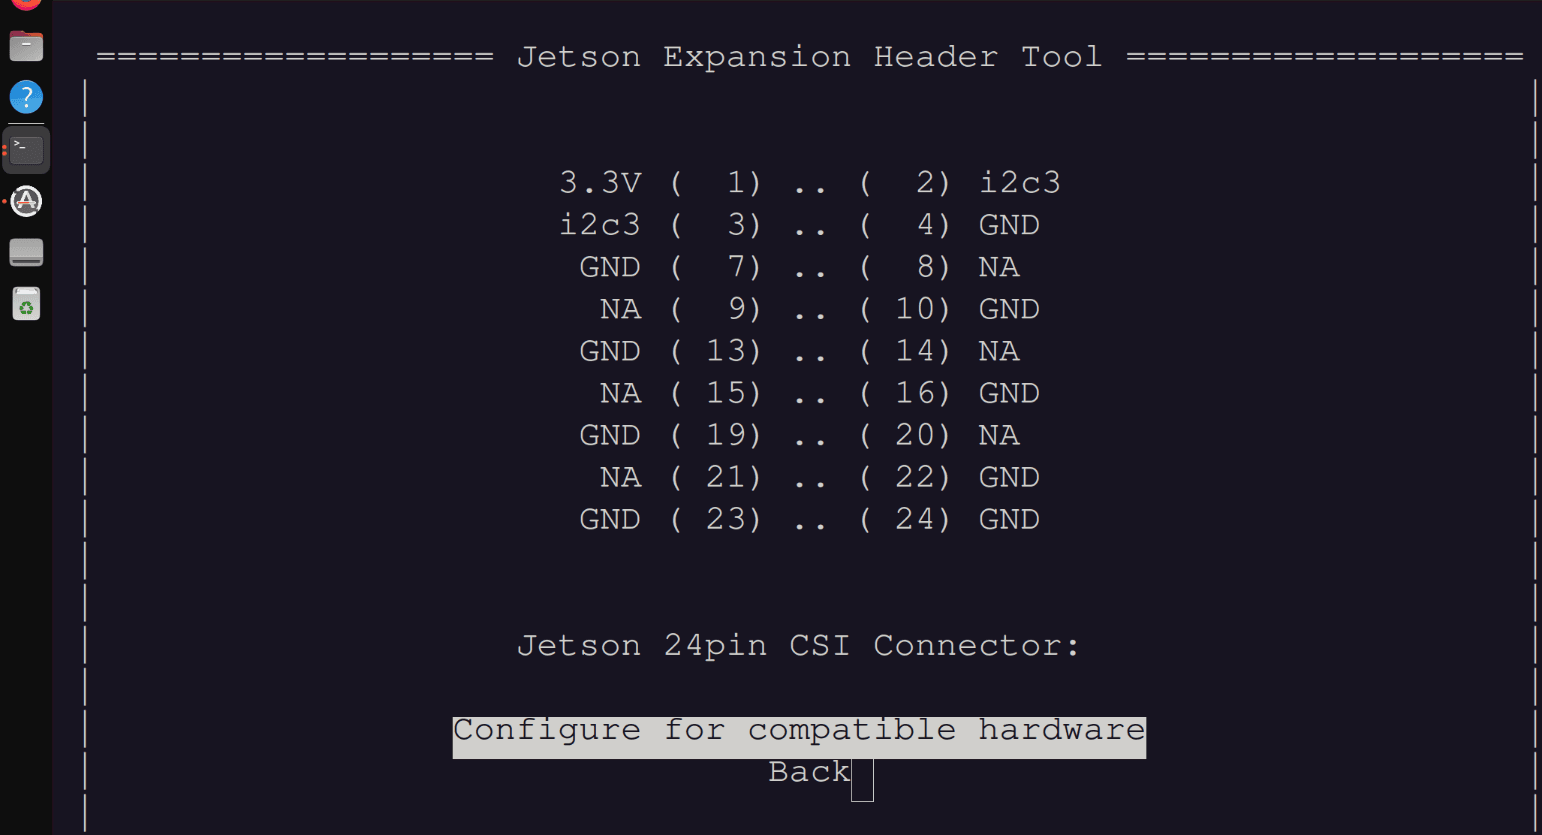
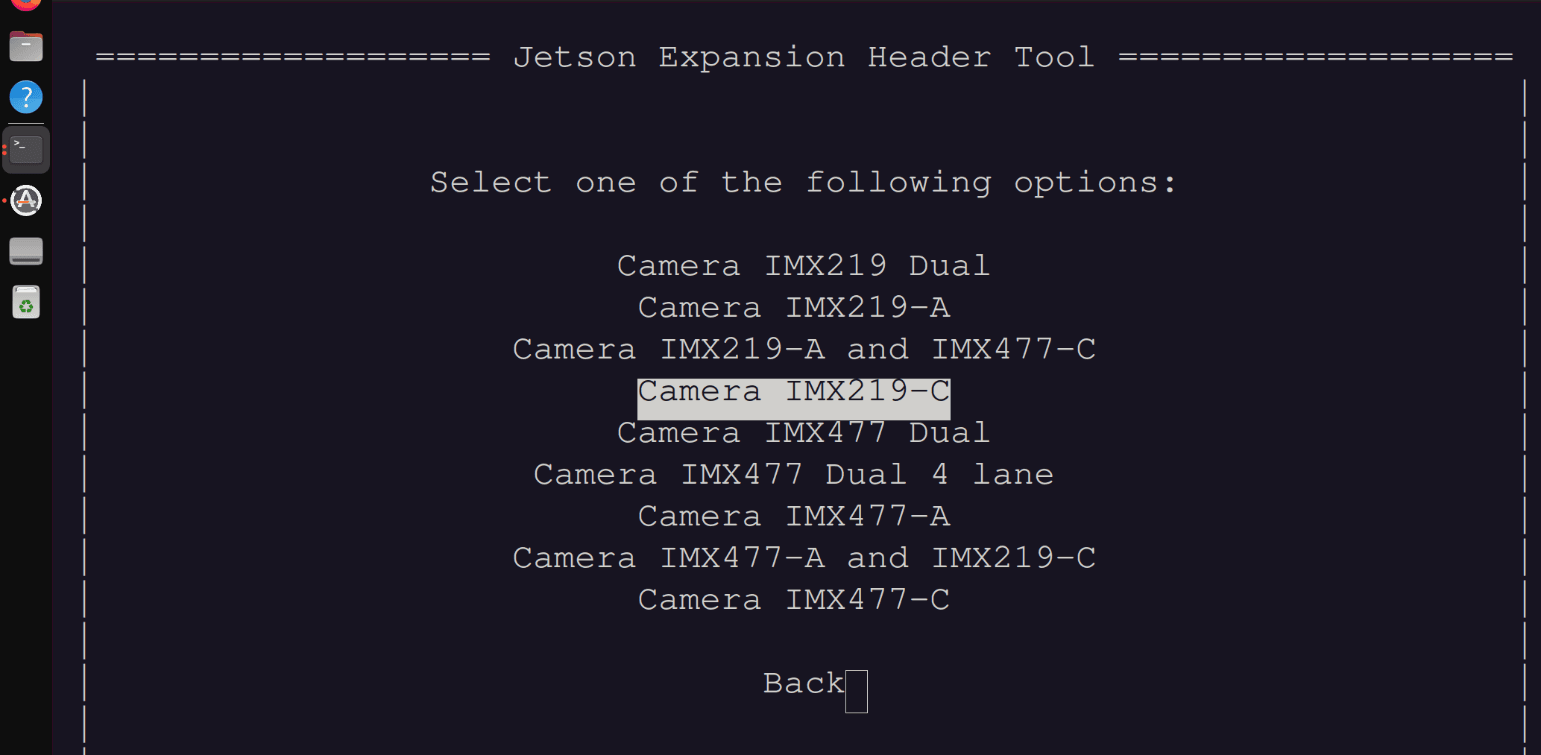
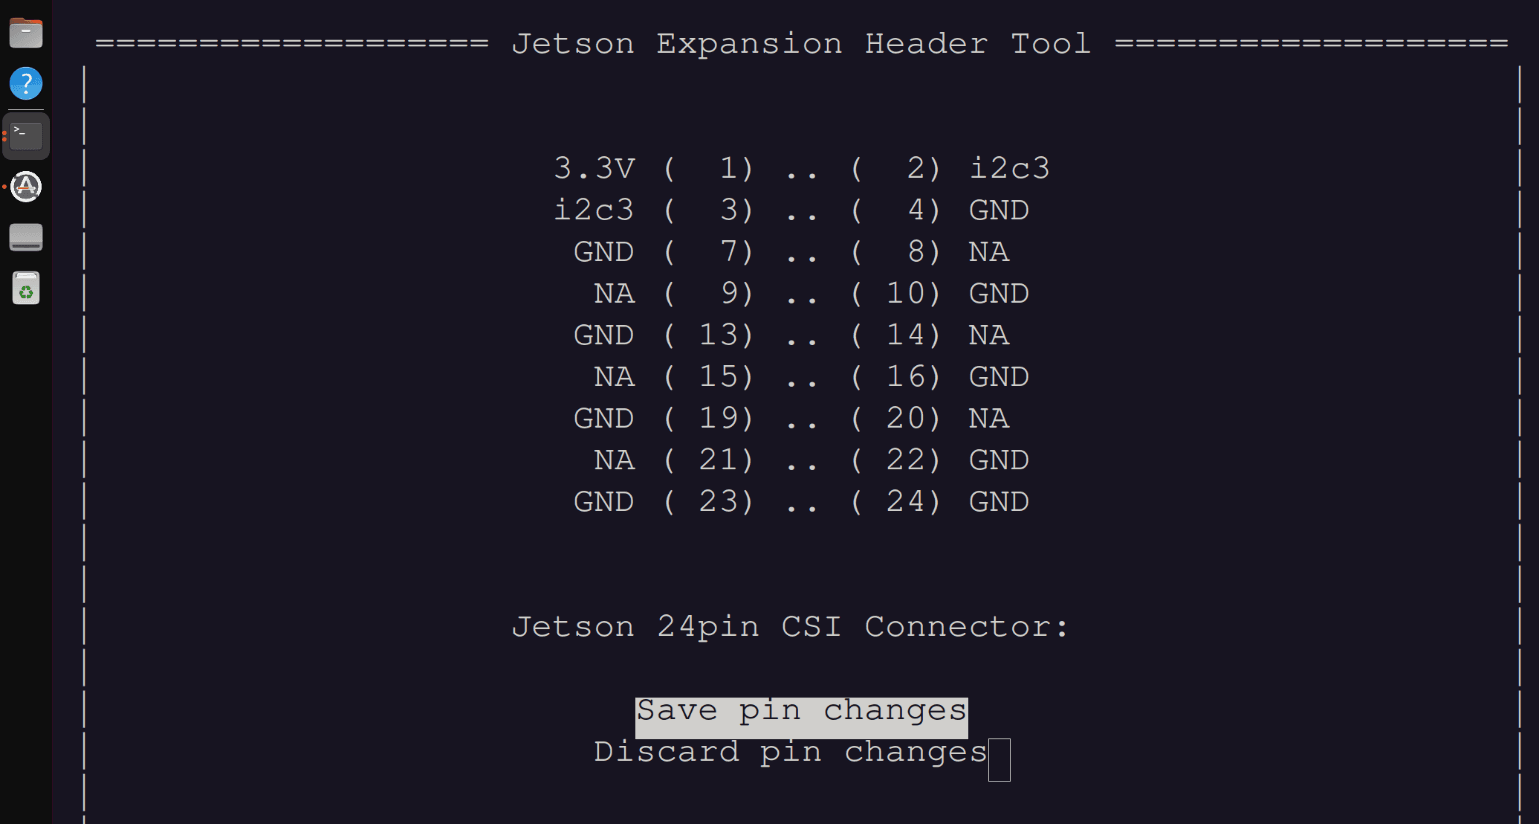
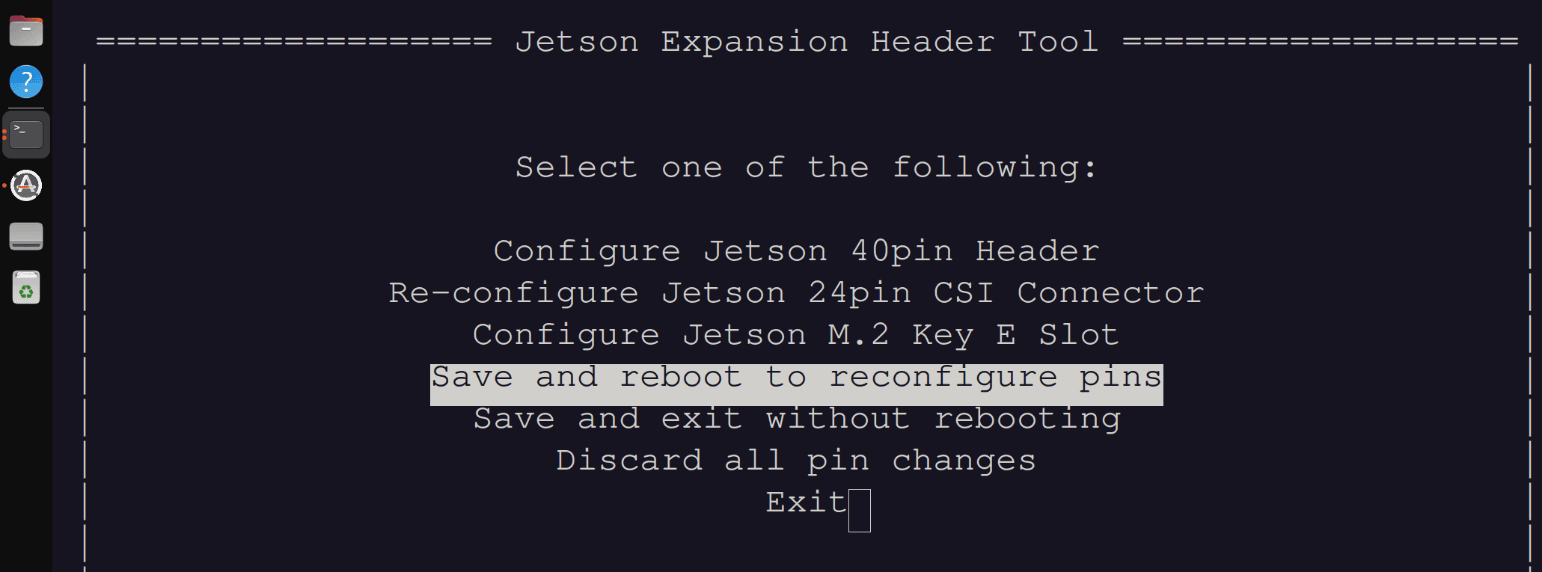
Follow the menu selections in order:
Select "Configure Jetson 22-pin CSI Connector":
Select "Configure for compatible hardware":
Select "Camera IMX219-C":
Select "Save pin changes":
Select "Save and reboot to reconfigure pins":
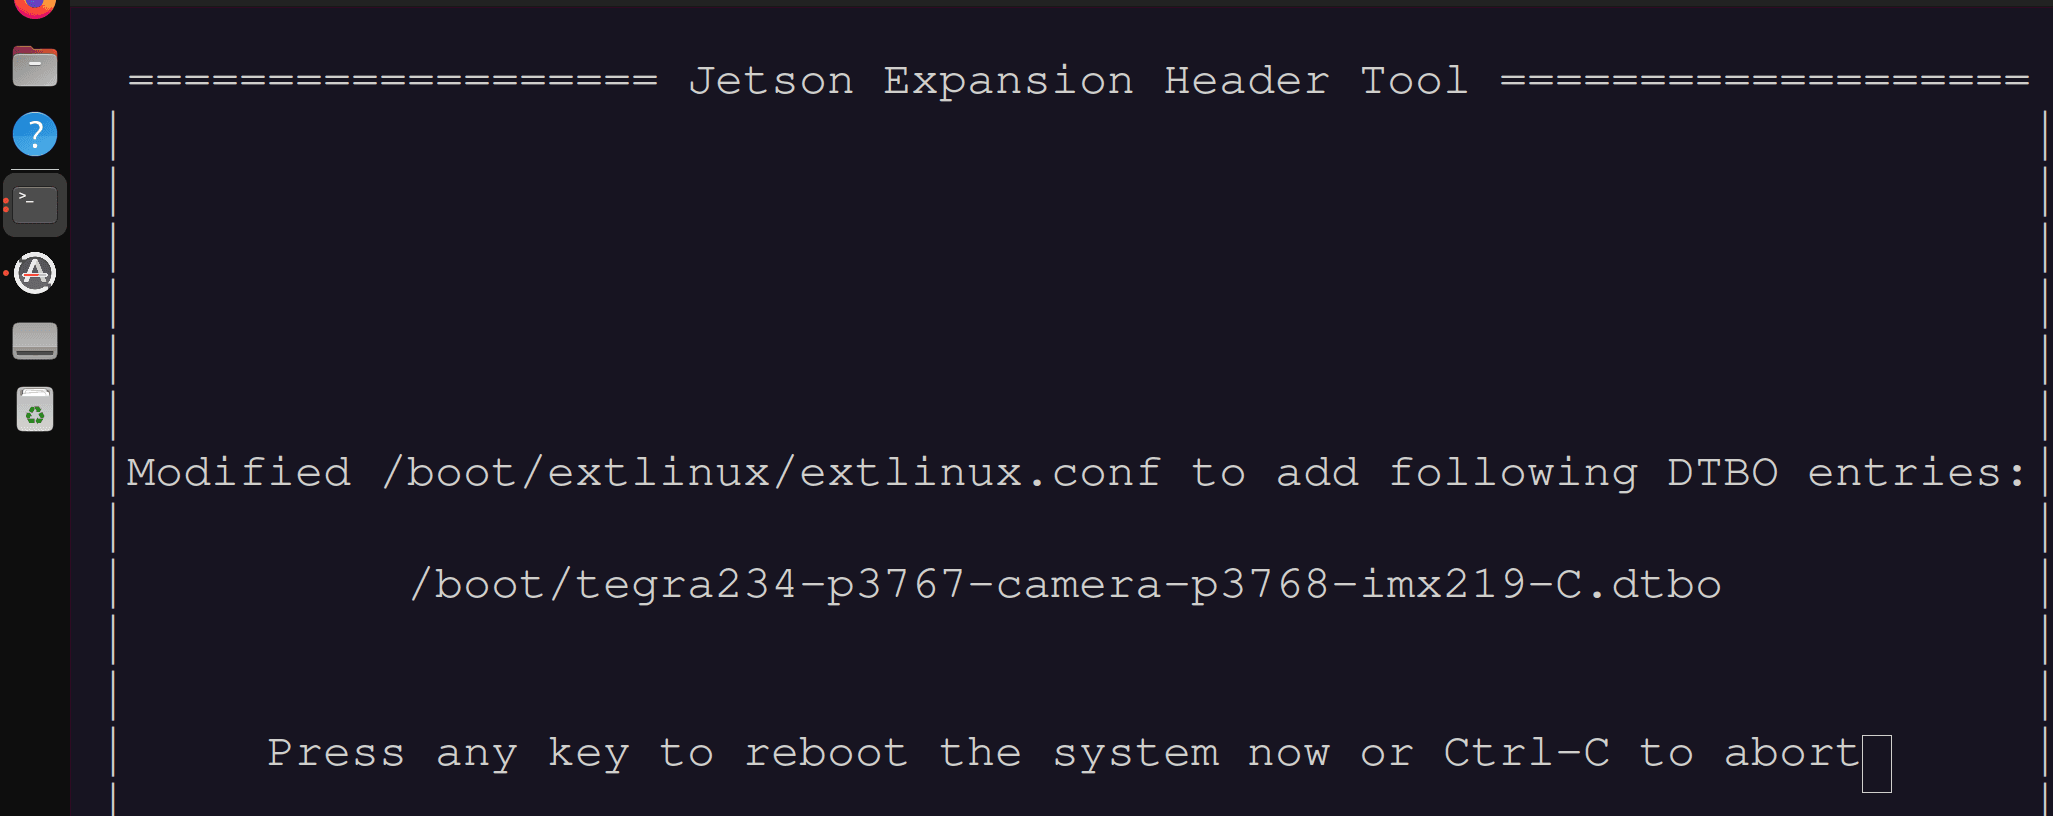
Step 10: Press Any Key to Reboot
The system will reboot and reconfigure the MIPI pins for the LVDS camera.
Info
- The system will shut down and restart. This process typically takes 30-60 seconds.