
Host Setup & Flashing
This phase prepares the host PC environment, extracts the pre-built L4T Oppila image, and flashes it to the Jetson AGX Orin Developer Kit via recovery mode.
Install Dependencies
Note
Skip step 1 if you have already installed the dependencies on the host machine.
Step 1: Update Package Lists and Install Required Packages
sudo apt update
sudo apt install -y qemu-user-static sshpass binutils abootimg libxml2-utils nfs-kernel-server u-boot-tools android-tools-fastboot python3-pip lz4
pip3 install -U pip
Prepare Working Directory
Step 2: Download Required Files
Download OPPILA_AGX_ORIN_L4T_36.5.0_LGHM.tar.bz2 provided by Oppila Support.
Step 3: Create a Working Directory
mkdir ~/OPPILA_AGX_ORIN_L4T_36.5.0_LGHMStep 4: Move the Downloaded Image
mv ~/Downloads/OPPILA_AGX_ORIN_L4T_36.5.0_LGHM.tar.bz2 ~/OPPILA_AGX_ORIN_L4T_36.5.0_LGHM/Step 5: Navigate to the New Directory
cd ~/OPPILA_AGX_ORIN_L4T_36.5.0_LGHM/Extract the OS Image
Step 6: Extract the Archive
Run the following command. Extraction may take several minutes:
sudo tar -xvJf OPPILA_AGX_ORIN_L4T_36.5.0_LGHM.tar.bz2Once complete, a directory named Linux_for_Tegra will be created inside ~/OPPILA_AGX_ORIN_L4T_36.5.0_LGHM/.
Step 7: Navigate to the Extracted Directory
cd Linux_for_Tegra/Set Recovery Mode
Step 8: Recovery Mode Setup
The Jetson AGX Orin Developer Kit uses the onboard Force Recovery button.
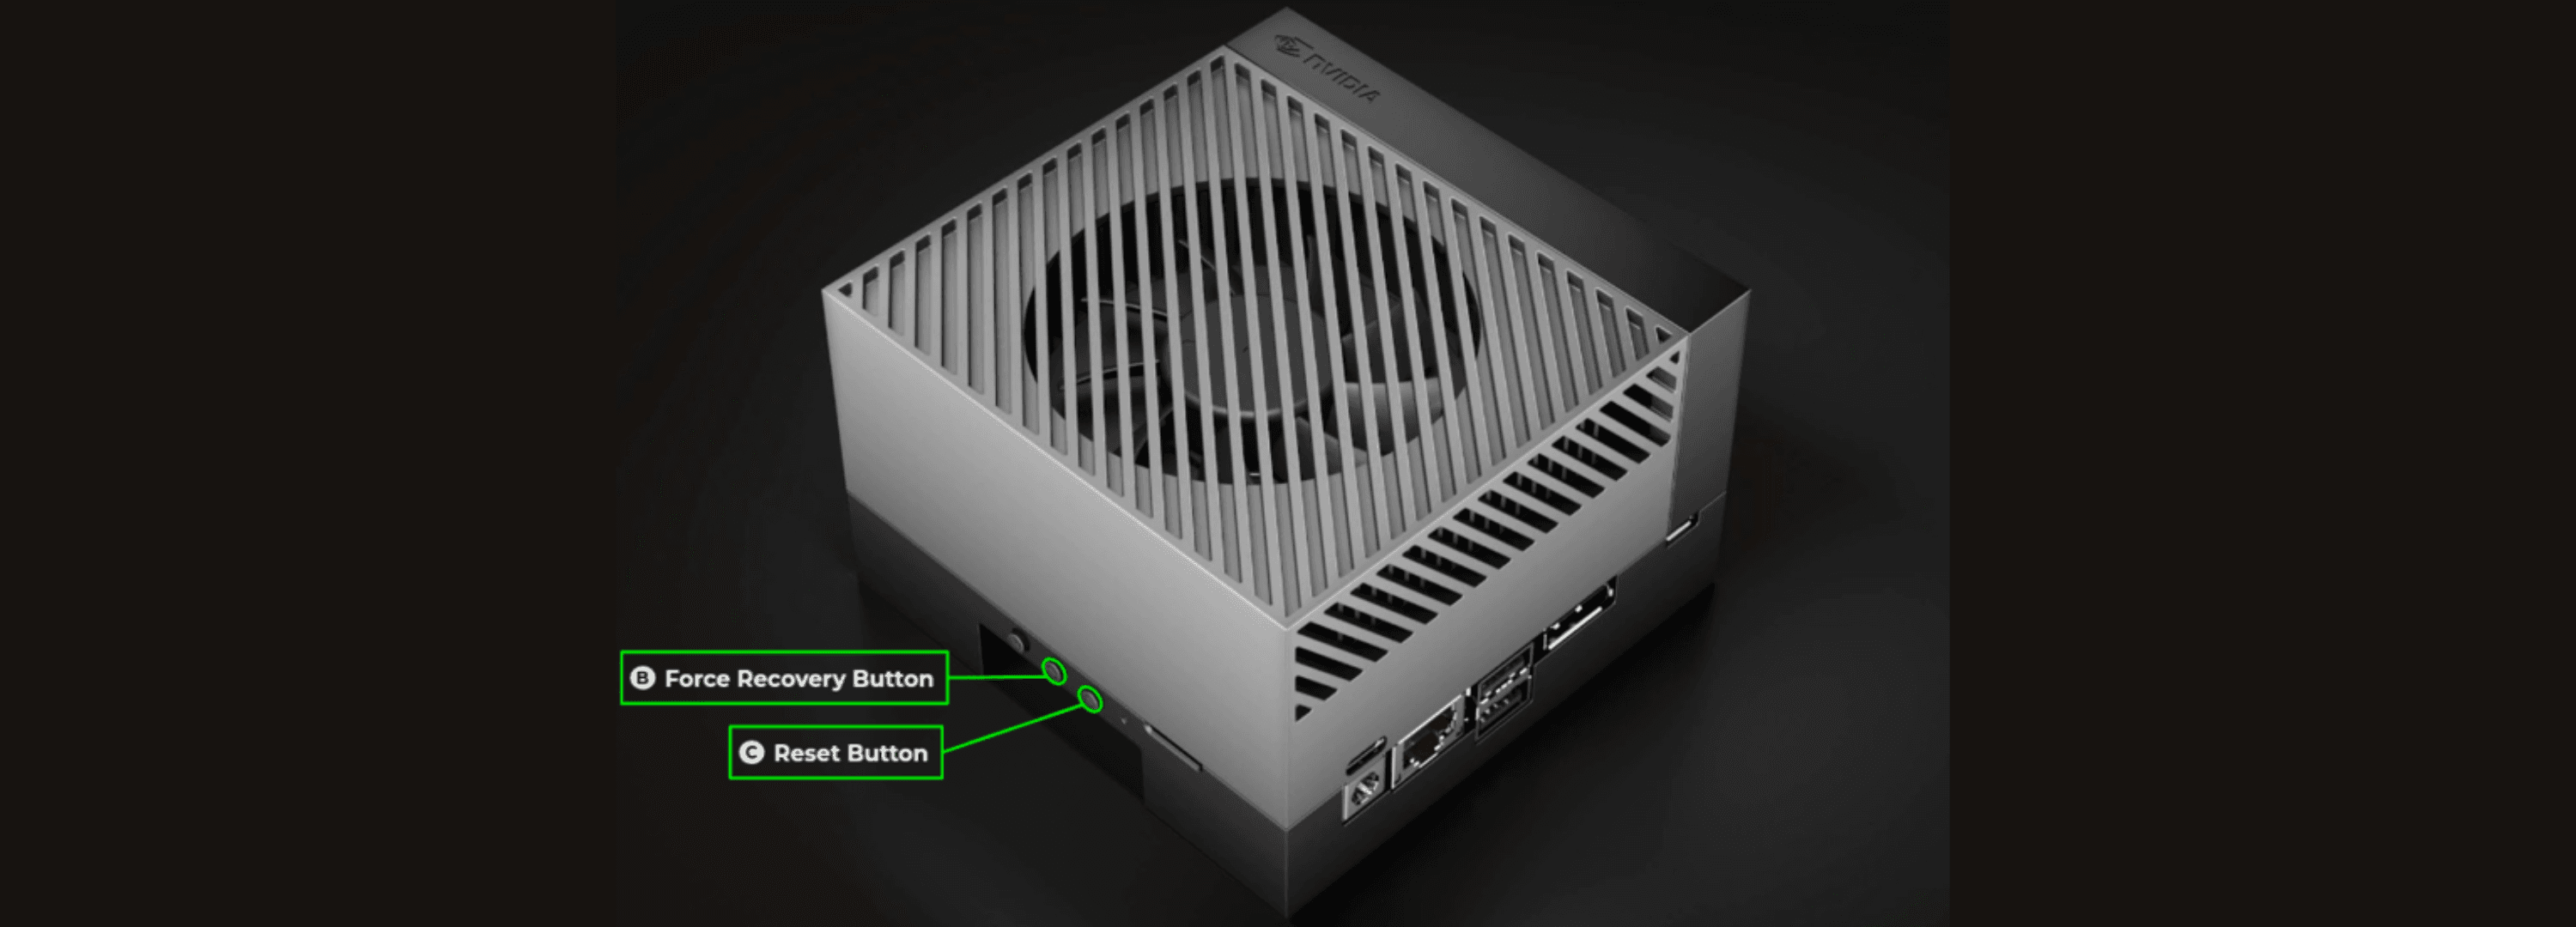
- Power off the Developer Kit
- Connect a USB Type-C cable from the Developer Kit to the host PC
- Press and hold the Force Recovery button
- While holding it, press and release the Reset button
- Release the Force Recovery button
Verify Device Detection
Step 9: Check the Jetson AGX Orin is detected in Recovery Mode on the Host PC terminal
lsusbLook for an entry such as: NVIDIA Corp. APX
Note
If the device is not visible, try a different USB cable or repeat the Force Recovery button sequence.
Flashing Image
Step 10: Execute the below command to flash the image from the Host PC to the Jetson AGX Orin
sudo ./nvsdkmanager_flash.sh --storage nvme0n1p1The terminal shows the flashing progress. Once it completes, the Jetson AGX Orin reboots into the new image.
Note
The flashing may take around 10-15 minutes.
Post-Flash Setup
Once flashing is complete:
Power off the Developer Kit and disconnect the power cable.
Disconnect the USB Type-C cable.
Connect the cameras via the AGX Orin MIPI CSI-2 Bridge Board to the Developer Kit as per the Full Connection setup.
Power on the AGX Orin MIPI CSI-2 Bridge Board first and then power on the Developer Kit, or both at the same time.
OEM Configuration Setup
On first boot, you will be guided through the following steps:
- Language Selection — Choose your preferred language.
- License Agreement — Accept the terms to continue.
- Networking — Configure Ethernet or Wi-Fi if needed.
- User Account — Create your NVIDIA account credentials.
- Password — Set a secure password for your account.
- Review & Finish — Confirm your settings and complete setup.
Once done, the device will boot into the NVIDIA Desktop Environment.