
Camera Configuration
After the Jetson AGX Orin Developer Kit boots with the AGX Orin MIPI CSI-2 Bridge Board connected, follow these steps to configure the camera interfaces.
Note
A single configuration covers all four bridge ports — LVDS–MIPI, HDMI–MIPI, 2-channel GMSL, and the straight MIPI CSI-2 pass-through. Ports without a camera attached are simply not enumerated.
Get Configuration folder
Note:
- Contact Oppila Support for
OPPILA_AGX_ORIN_L4T_36.5.0_INTEGRATION.zip
Step 1: Open Terminal on the Developer Kit
- Press
Ctrl + Alt + T
Step 2: Extract Configuration folder
unzip ~/Downloads/OPPILA_AGX_ORIN_L4T_36.5.0_INTEGRATION.zipConfig folder contains :
Driver Configuration
Step 3: Navigate to Configuration folder
cd ~/OPPILA_AGX_ORIN_L4T_36.5.0_INTEGRATIONStep 4: Grant executable permissions to files
sudo chmod +x config.sh
sudo chmod +x rc.local
Step 5: Execute config.sh script
Execute the config script using the following command, replacing <serial_no> with your AGX Orin MIPI CSI-2 bridge board serial number.
sudo sh config.sh <serial_no>This script file does the following steps:
- Loads the kernel and configuration module.
- Loads Device Tree.
Tip
You can find the serial number printed on the front of your bridge board.
Configure Device Tree Overlay
Note
This is a one-time configuration required after each new flash. It is not required on every boot.
Step 6: Open Terminal on the Developer Kit
- Press
Ctrl + Alt + T
Step 7: Run the Jetson-IO Configuration Tool
sudo /opt/nvidia/jetson-io/jetson-io.pyStep 8: Navigate to Configuration Menu
Follow the menu selections in order:
Select the Jetson AGX CSI Connector:
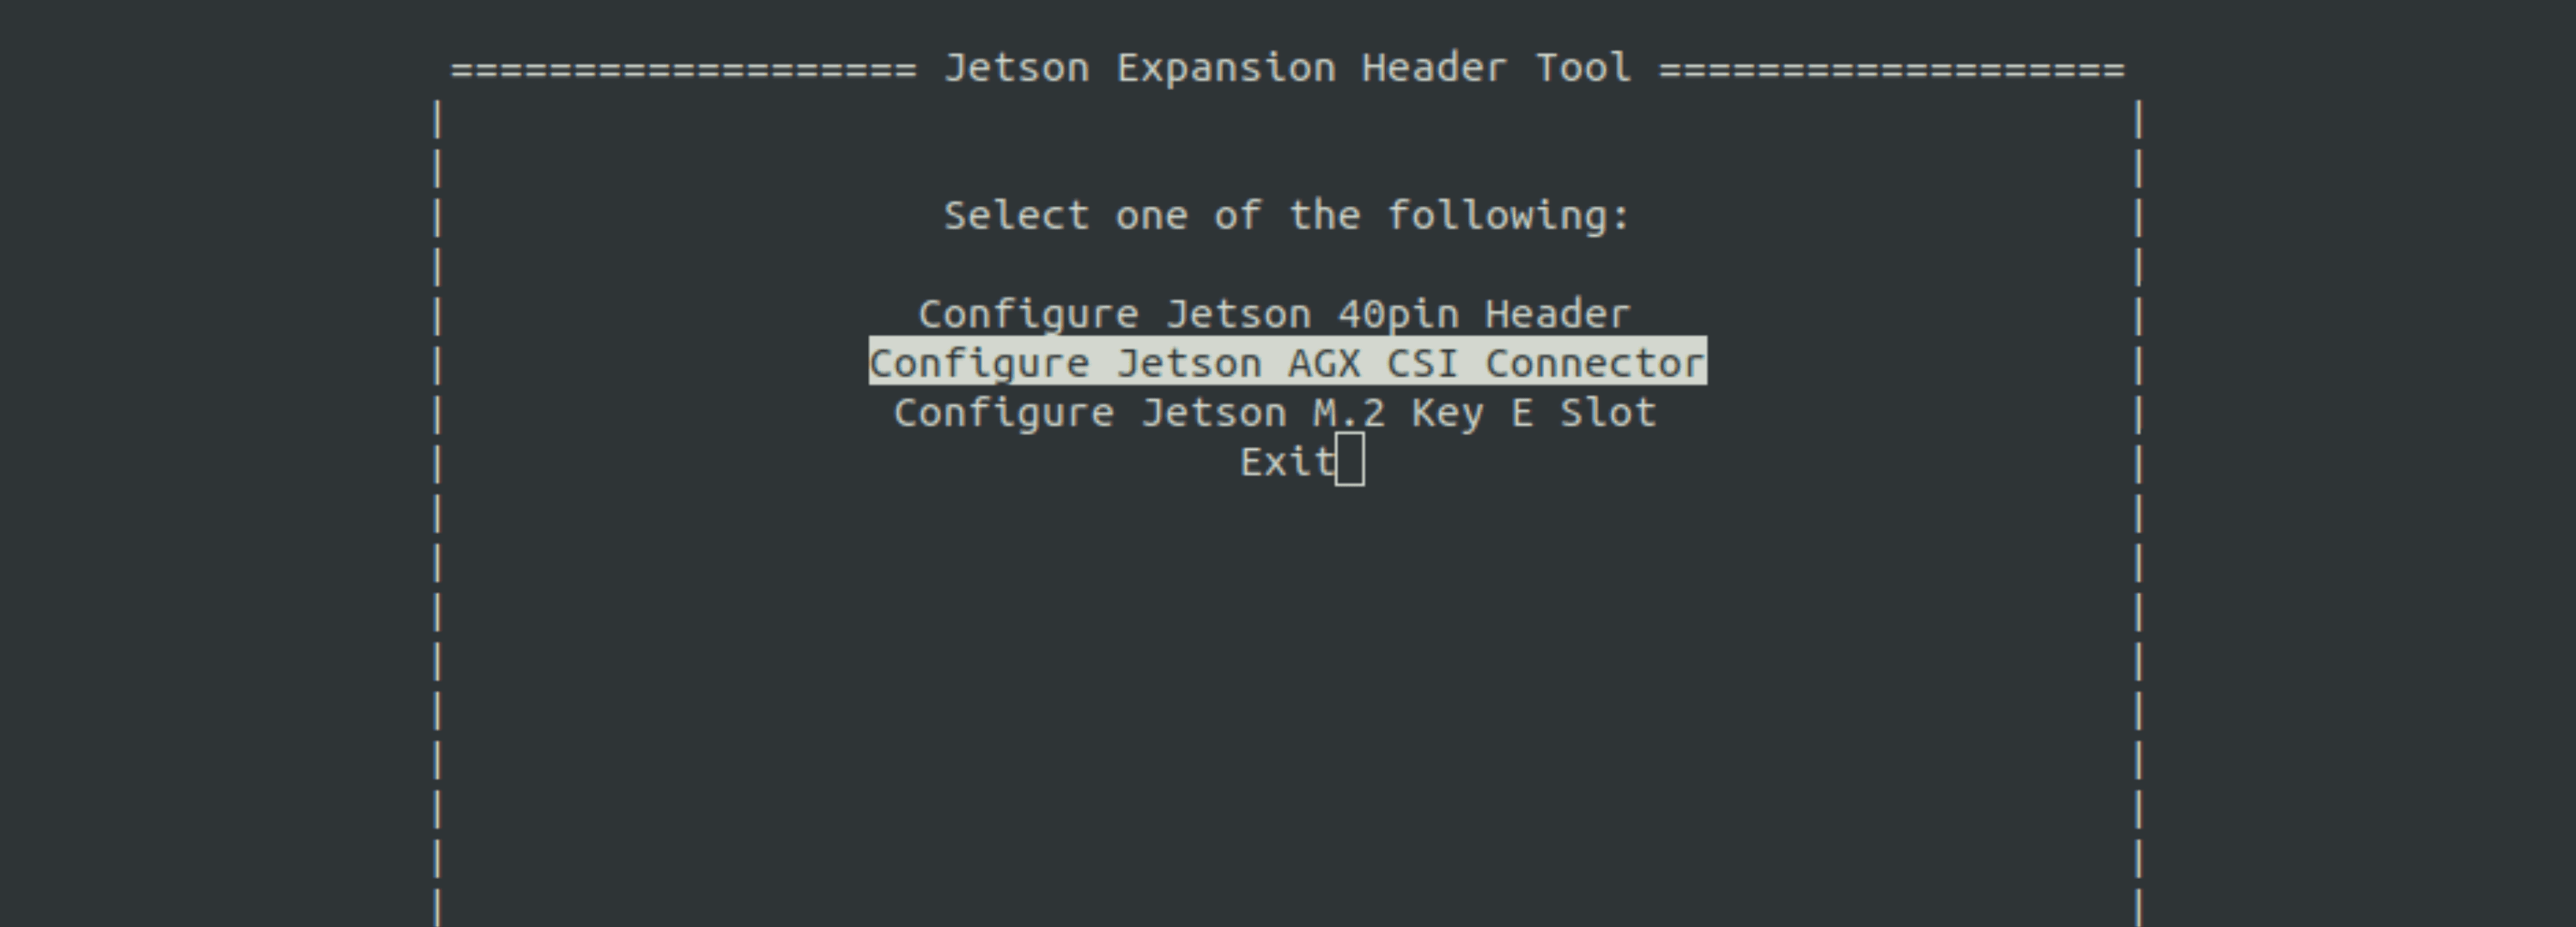
Select "Configure for compatible hardware":
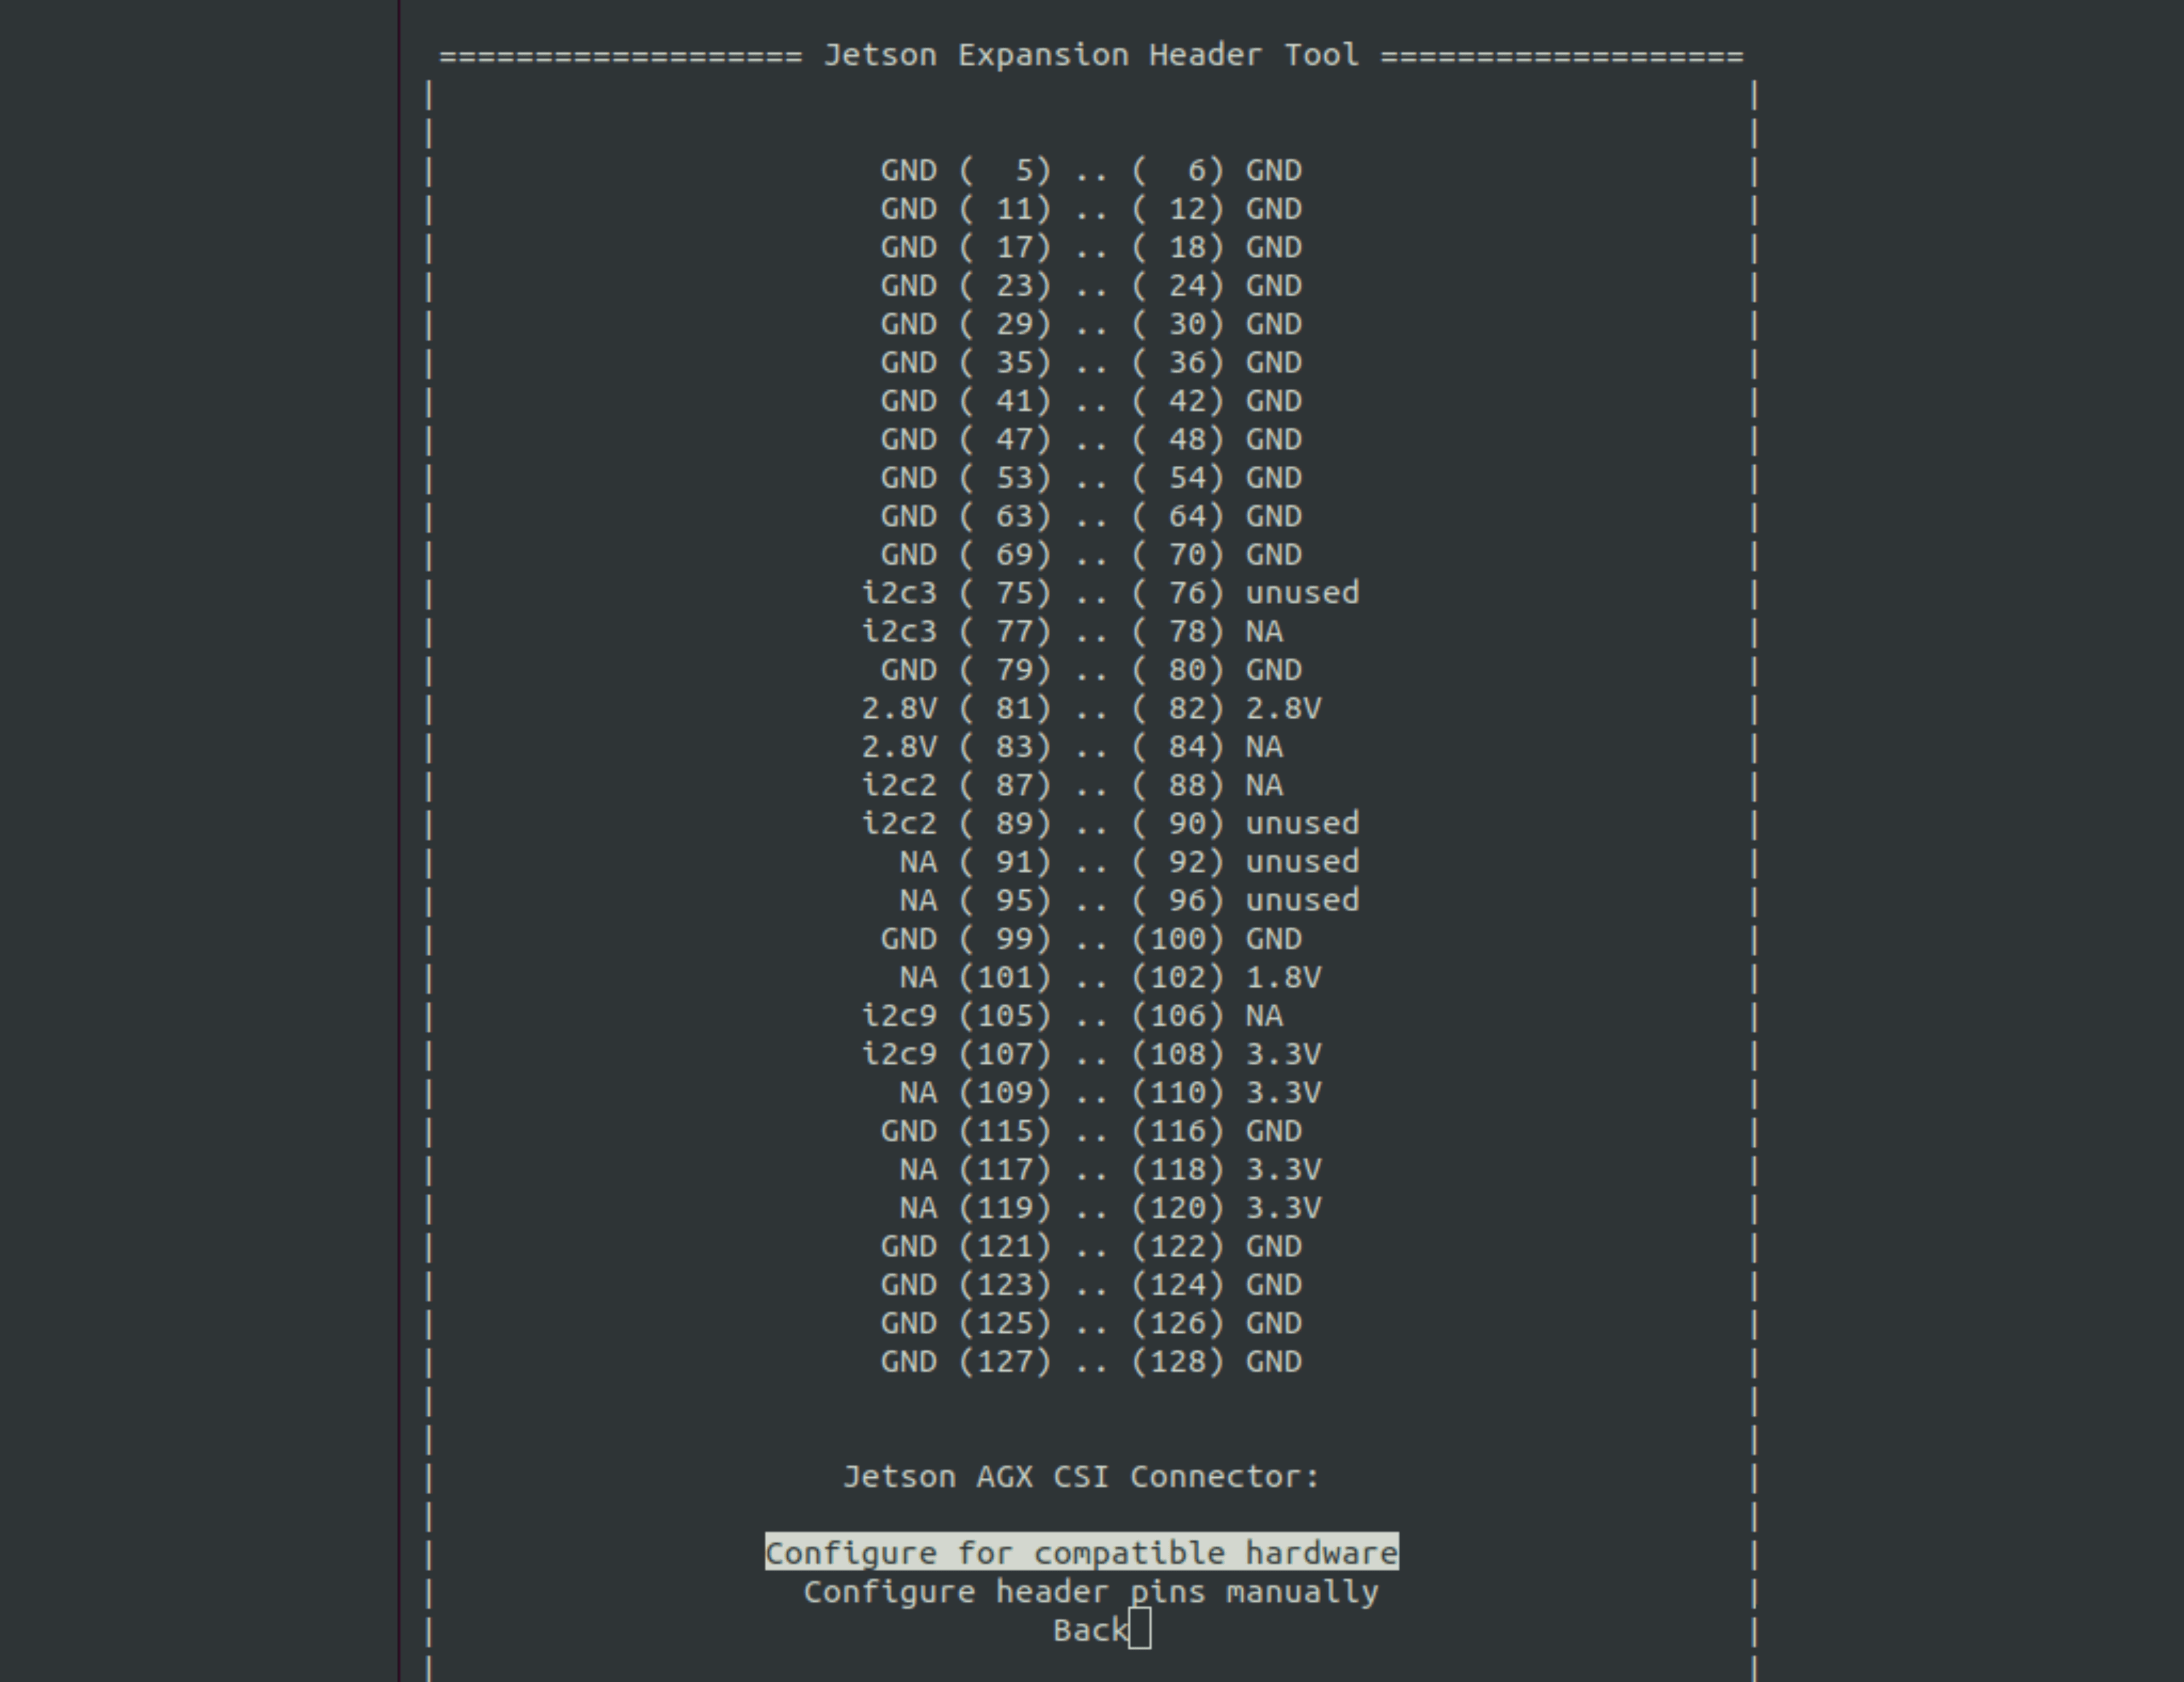
Select the AGX Orin MIPI CSI-2 Bridge camera entry:
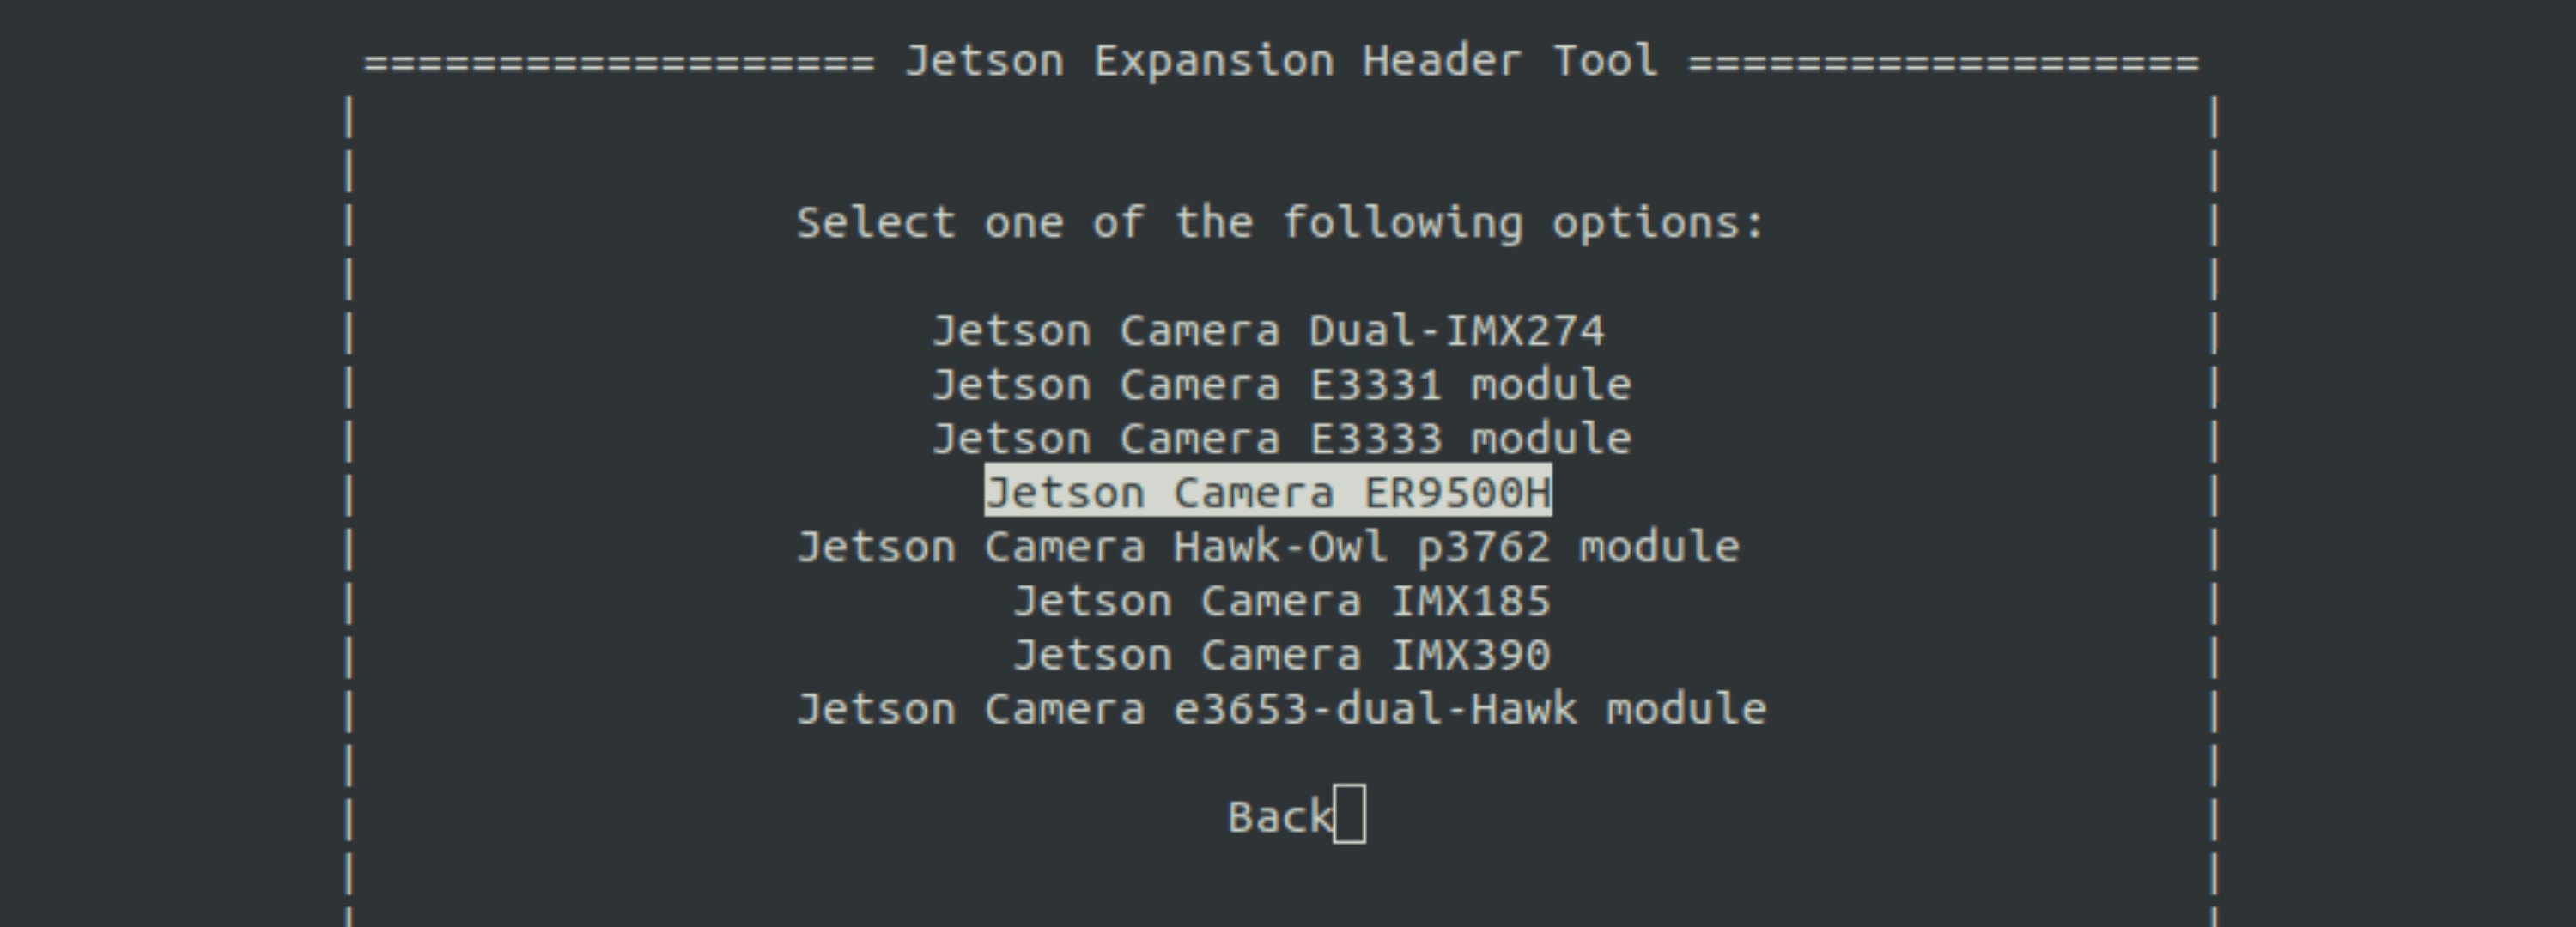
Select "Save pin changes":
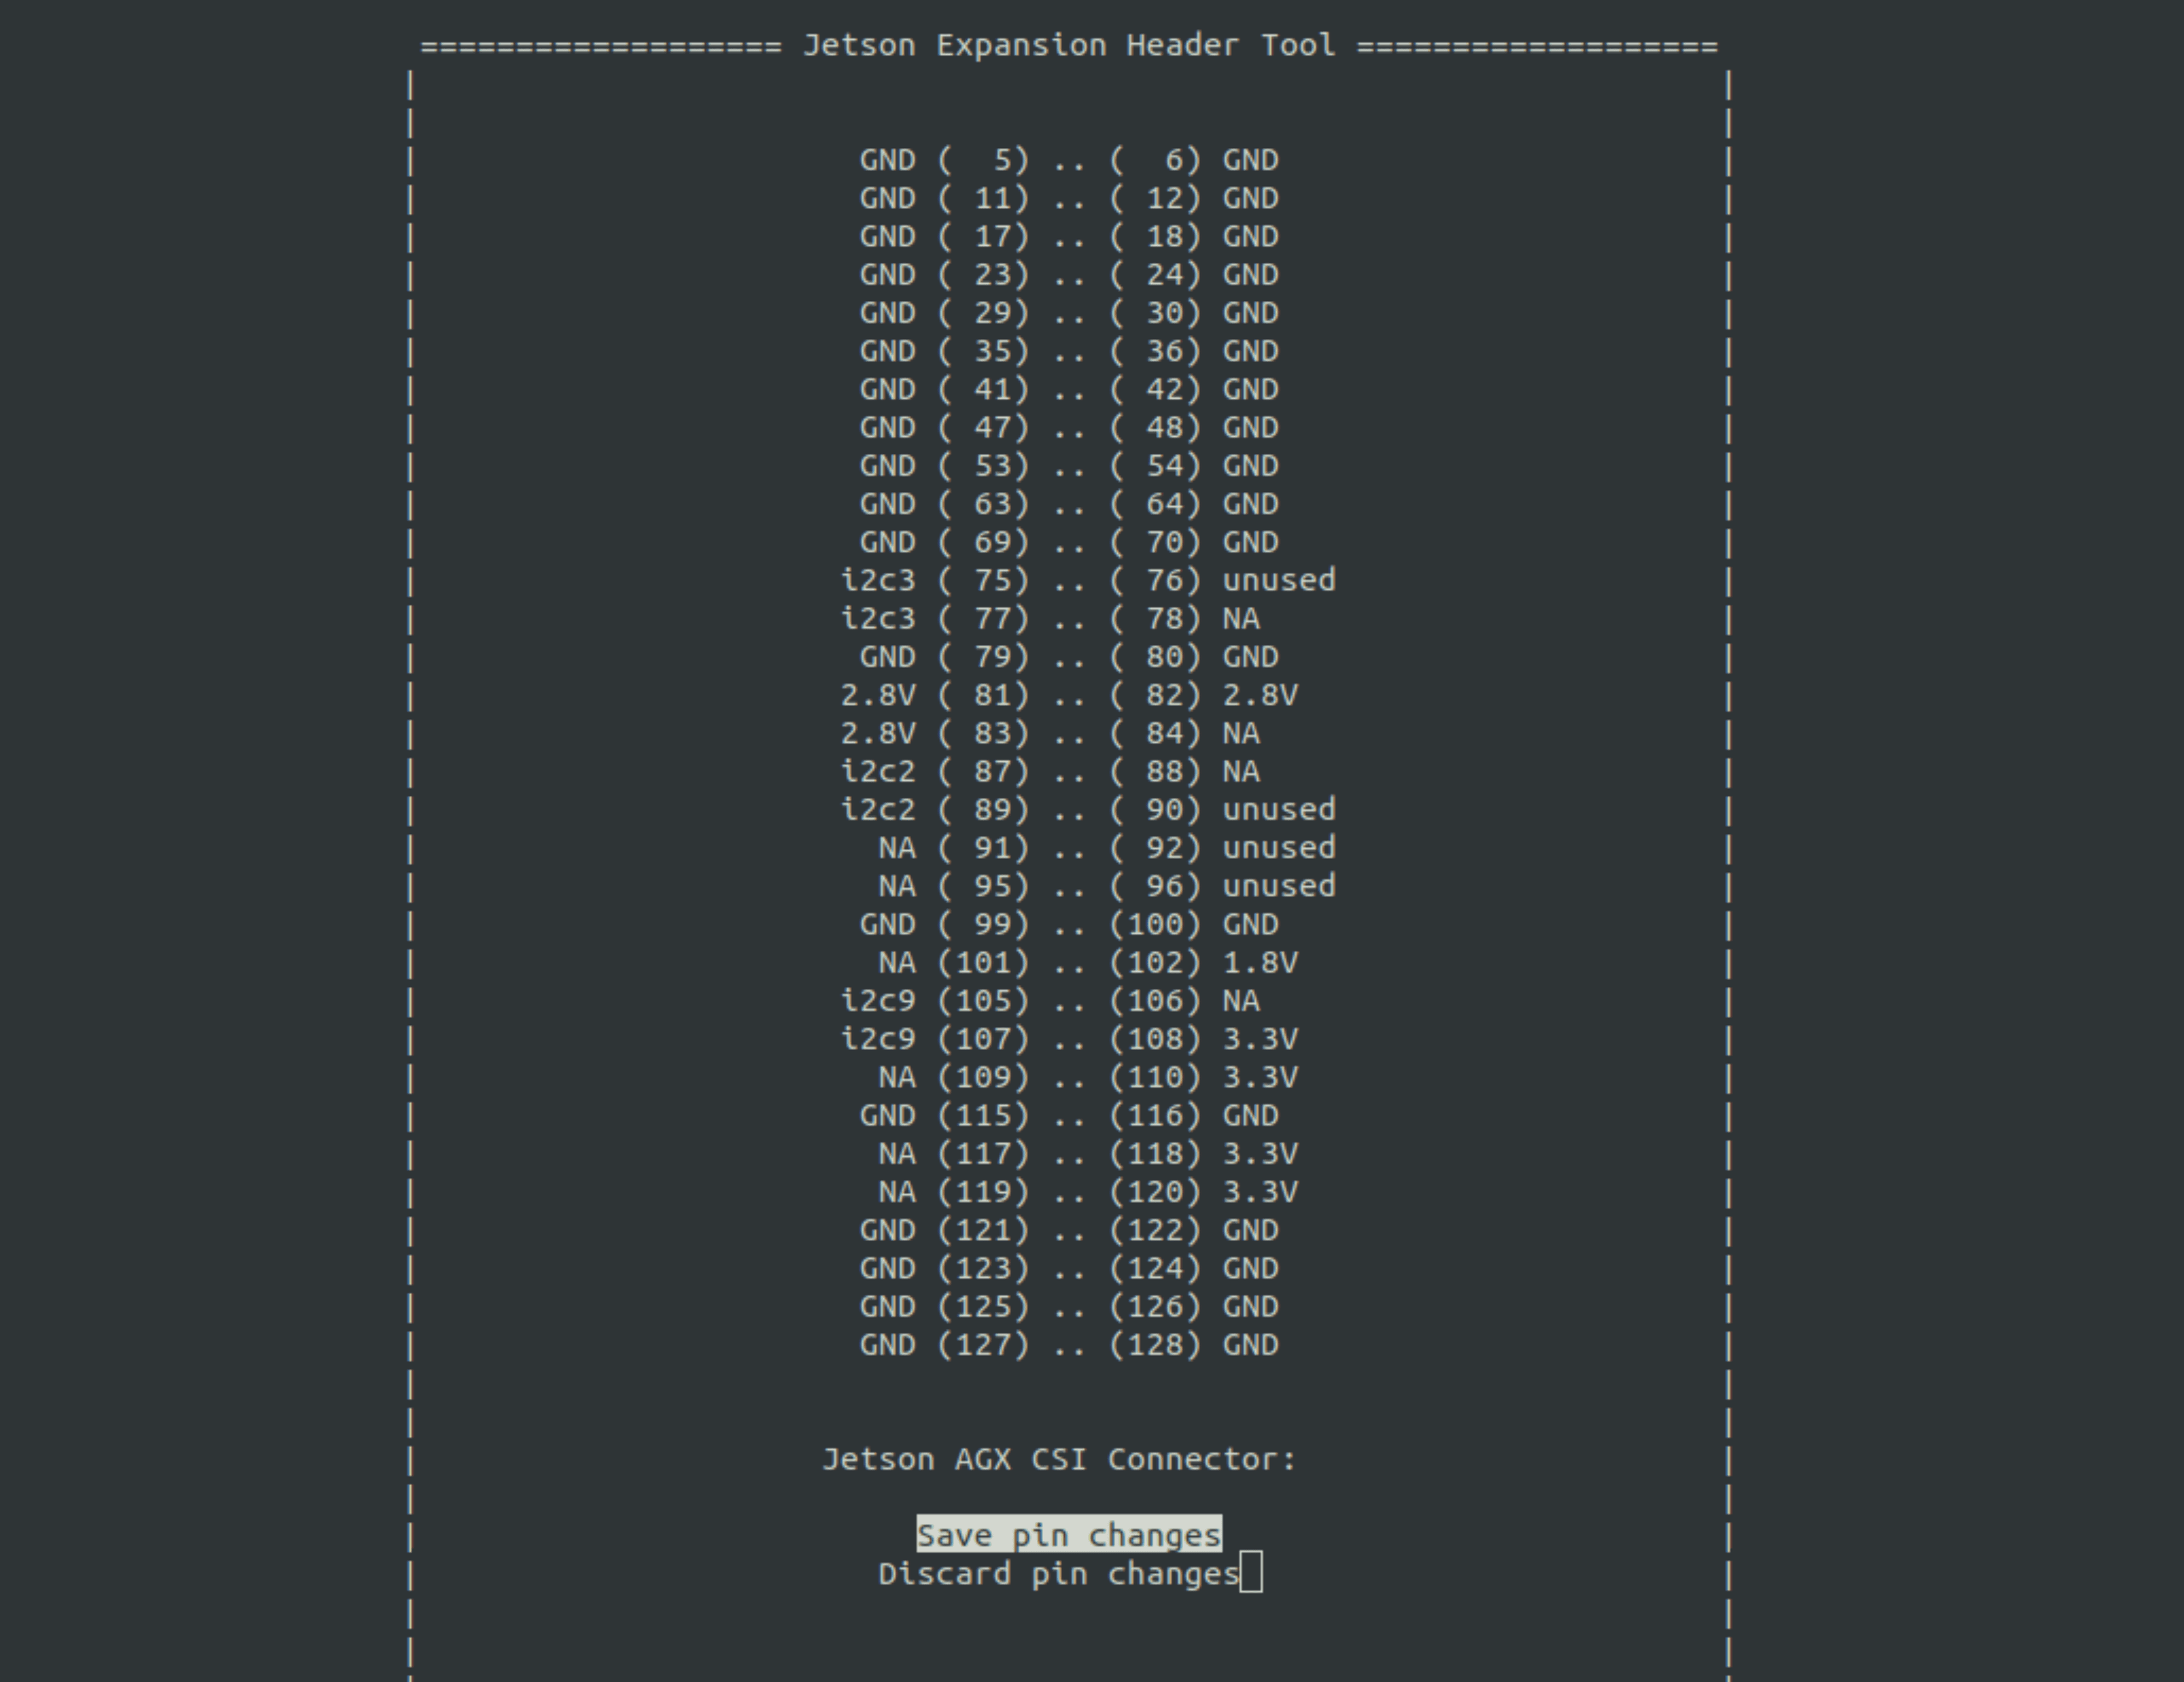
Select "Save and reboot to reconfigure pins":
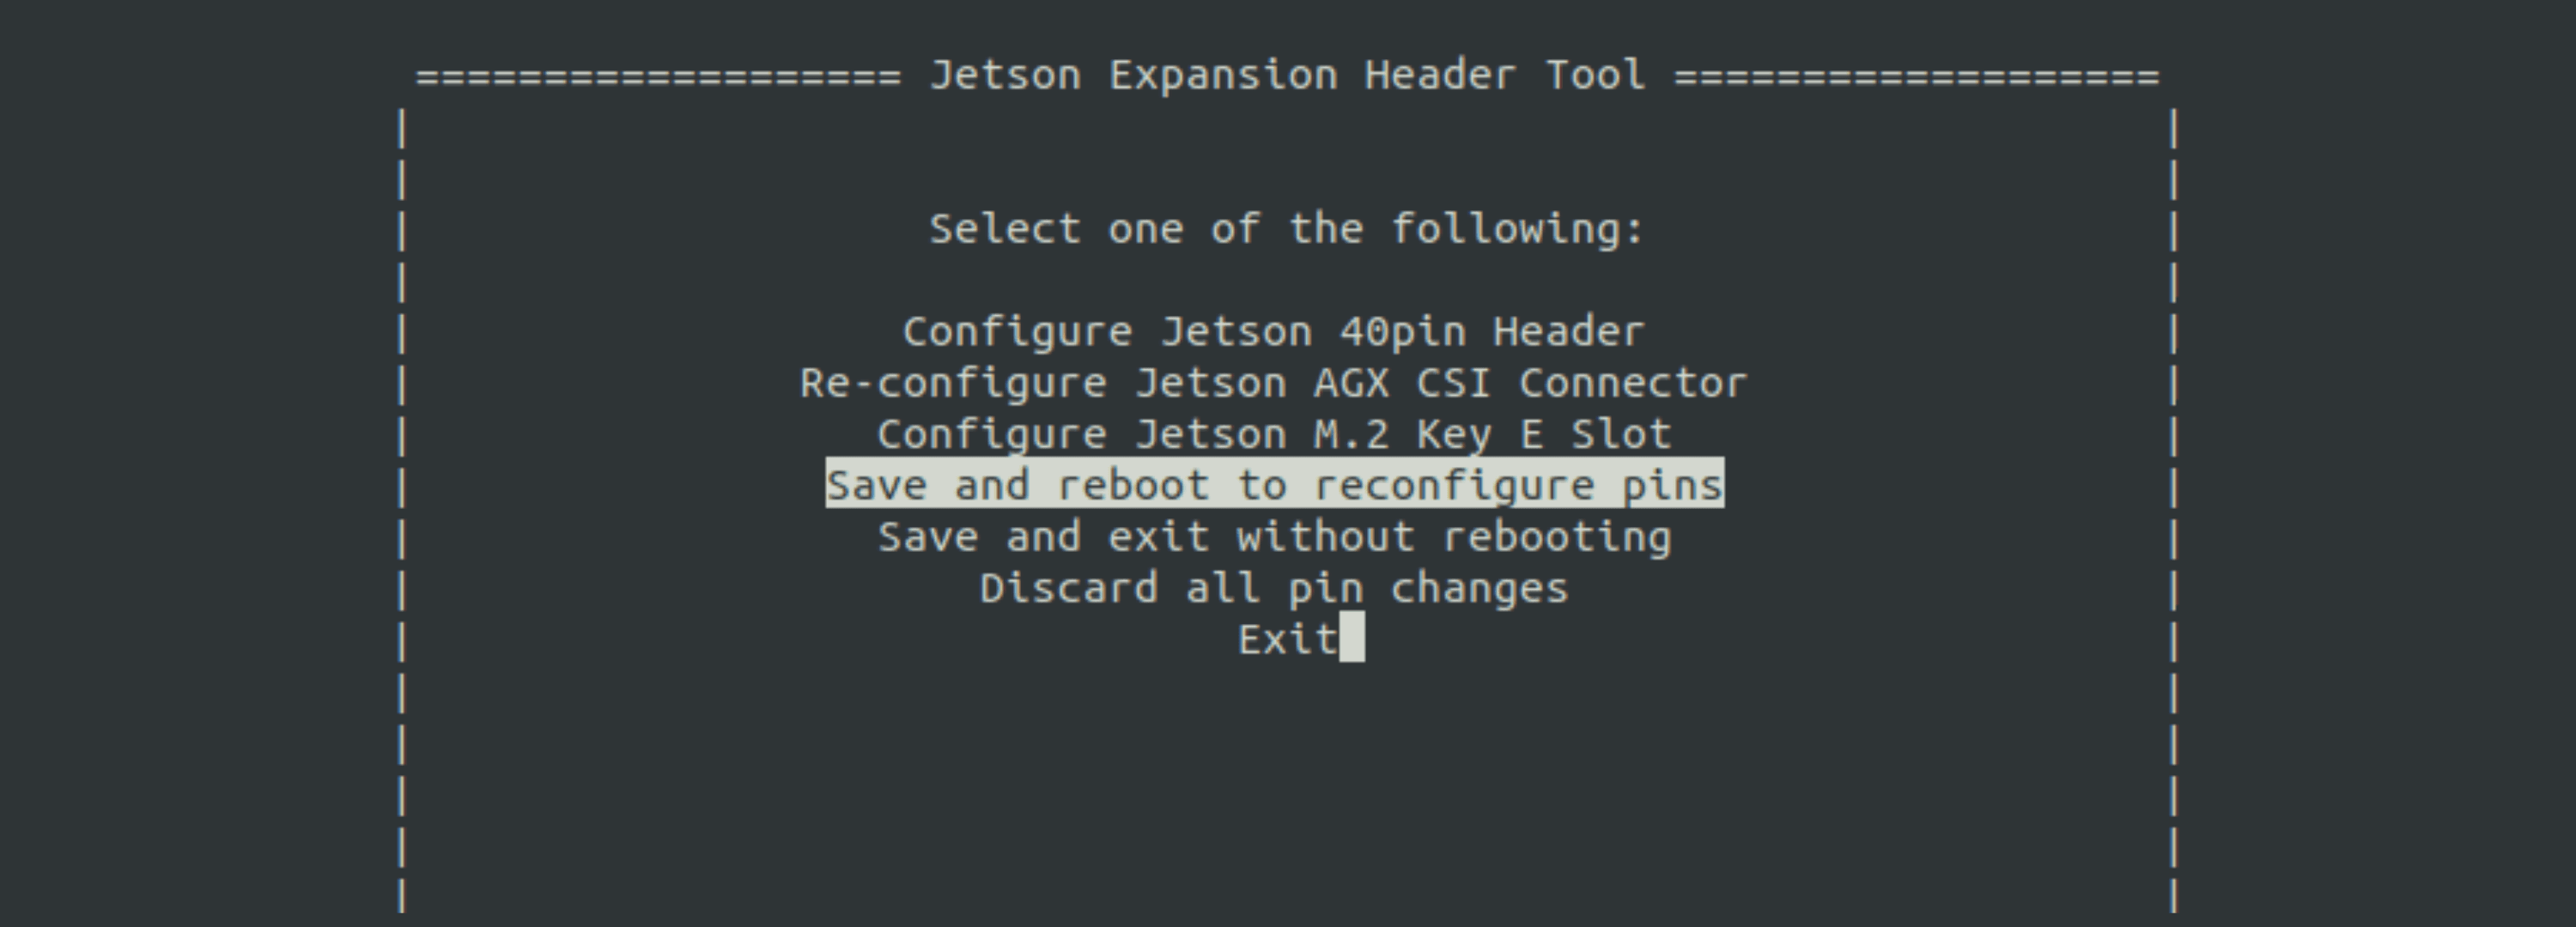
Step 9: Press Any Key to Reboot
The system will reboot and reconfigure the MIPI pins for the connected cameras.
Press any key to reboot to complete the changes:
Info
- The system will shut down and restart. This process typically takes 30-60 seconds.