LVDS & MIPI Configuration
Once the board has booted with the LVDS and MIPI cameras connected, follow the steps below to configure the camera interface.
Warning
This page covers LVDS + MIPI dual-camera configuration. If you are using only an LVDS camera, go to LVDS Configuration instead.
Transfer Configuration File
Note:
Contact Oppila Support for
rc.localfile.Copy the
rc.localfile from the Host PC to the USB storage device.
Step 1: Open Terminal on the Jetson
- Press
Ctrl + Alt + T
Step 2: Copy rc.local to Jetson
Transfer the rc.local file from your PC to the home directory of the AstrOptix Board using a USB drive or SCP.
Run the following commands for copy the files to the jetson Orin Nano/NX
sudo cp /media/<username>/<pendrive_name>/rc.local /home/<username>/
sudo chmod +x rc.localReplace the following placeholders with actual values:
<username>- Your system username<pendrive_name>- The label/name of your USB storage device
Driver Configuration
Note
Contact Oppila Support for
lvdsmipi.koandcamconf.kofile.Copy the
lvdsmipi.koandcamconf.kofiles from the Host PC to the USB storage device.
Step 3: Navigate to Kernel Module Directory
Change the current working directory to the kernel module directory using the following command:
cd /lib/modules/5.15.148-tegra/updates/drivers/media/i2c/Step 4: Copy Kernel Module from USB Storage
Execute the following command to copy the kernel module file from the USB storage device to the current directory:
sudo cp /media/<username>/<pendrive_name>/lvdsmipi.ko_<serial_no>.ko lvdsmipi.koStep 5: Copy Config Kernel Module from USB Storage
Execute the following command to copy the Config kernel module file from the USB storage device to the current directory:
sudo cp /media/<username>/<pendrive_name>/camconf.ko_<serial_no>.ko camconf.koStep 6: Copy Device tree file to “/boot” directory in the Jetson Orin Nano/NX
Execute the following command to copy the device tree file from the USB storage device to the boot directory:
sudo cp /media/<username>/<pendrive_name>/tegra234-p3767-camera-p3768-imx219-C.dtbo /boot/Replace the following placeholders with actual values:
<username>- Your system username<pendrive_name>- The label/name of your USB storage device<serial_no>- Contact Oppila Support forSerial Number
Kernel Module Configuration
Step 6: Navigate to the modules-load.d directory
cd /etc/modules-load.d/Step 7: Create the original Kernel module configuration file for loading
sudo vi lvdsmipi.conf- Inside the created file, write –
lvdsmipi - Save and close the file –
Shift + ZZ
Step 8: Create the config Kernel module configuration file for loading
sudo vi camconf.conf- Inside the created file, write –
camconf - Save and close the file –
Shift + ZZ
Step 9: Run the below command to check the available Kernel modules to load
sudo depmod -aConfigure Device Tree Overlay
Note
This is a one-time configuration required after each new flash. It is not required on every boot.
Step 10: Open Terminal on the Jetson
Press Ctrl + Alt + T on the Jetson to open a terminal window.
Step 11: Run the Jetson-IO Configuration Tool
sudo /opt/nvidia/jetson-io/jetson-io.pyStep 12: Navigate to Configuration Menu
Follow the menu selections in order:
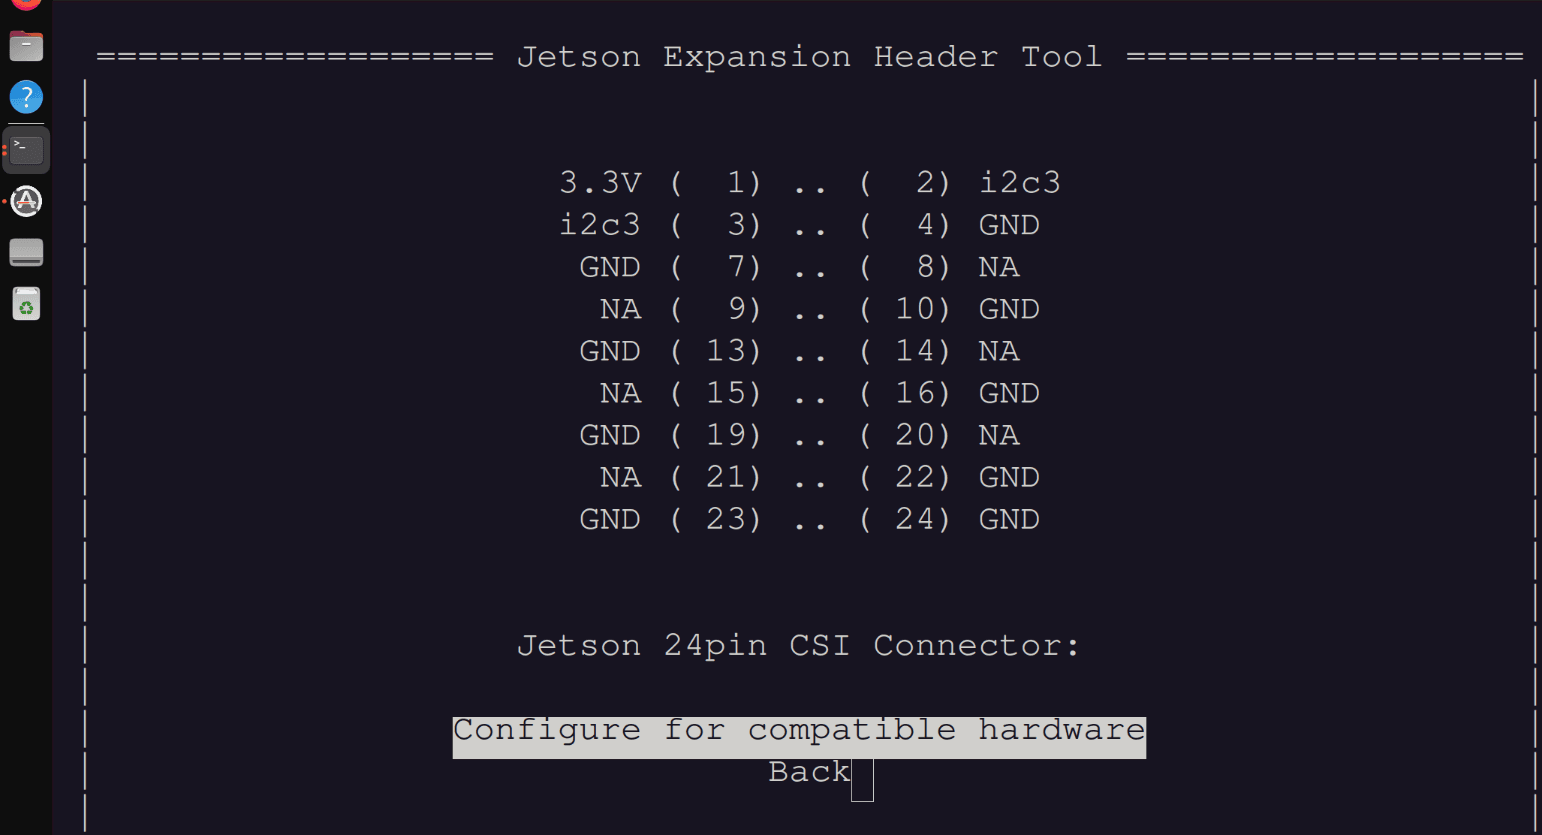
Select "Configure Jetson 24-pin CSI Connector":

Select "Configure for compatible hardware":

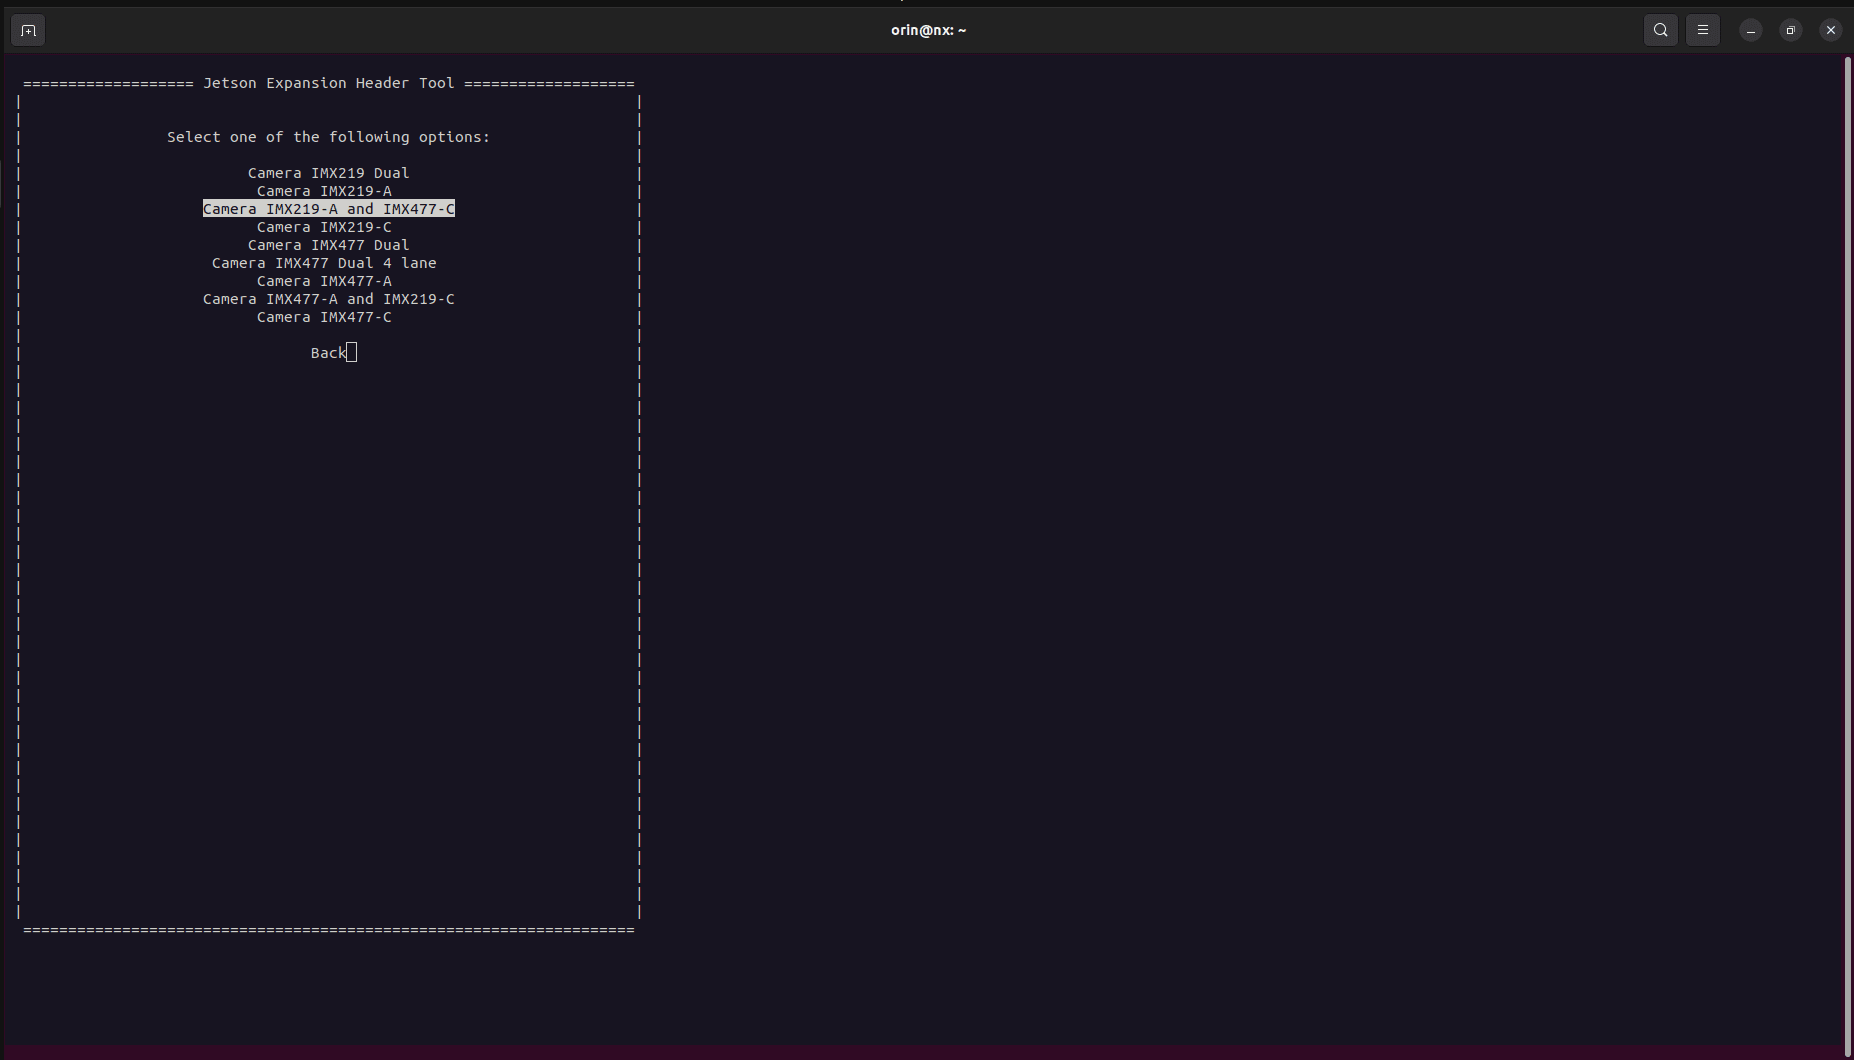
Select "Camera IMX219-A and IMX477-C":

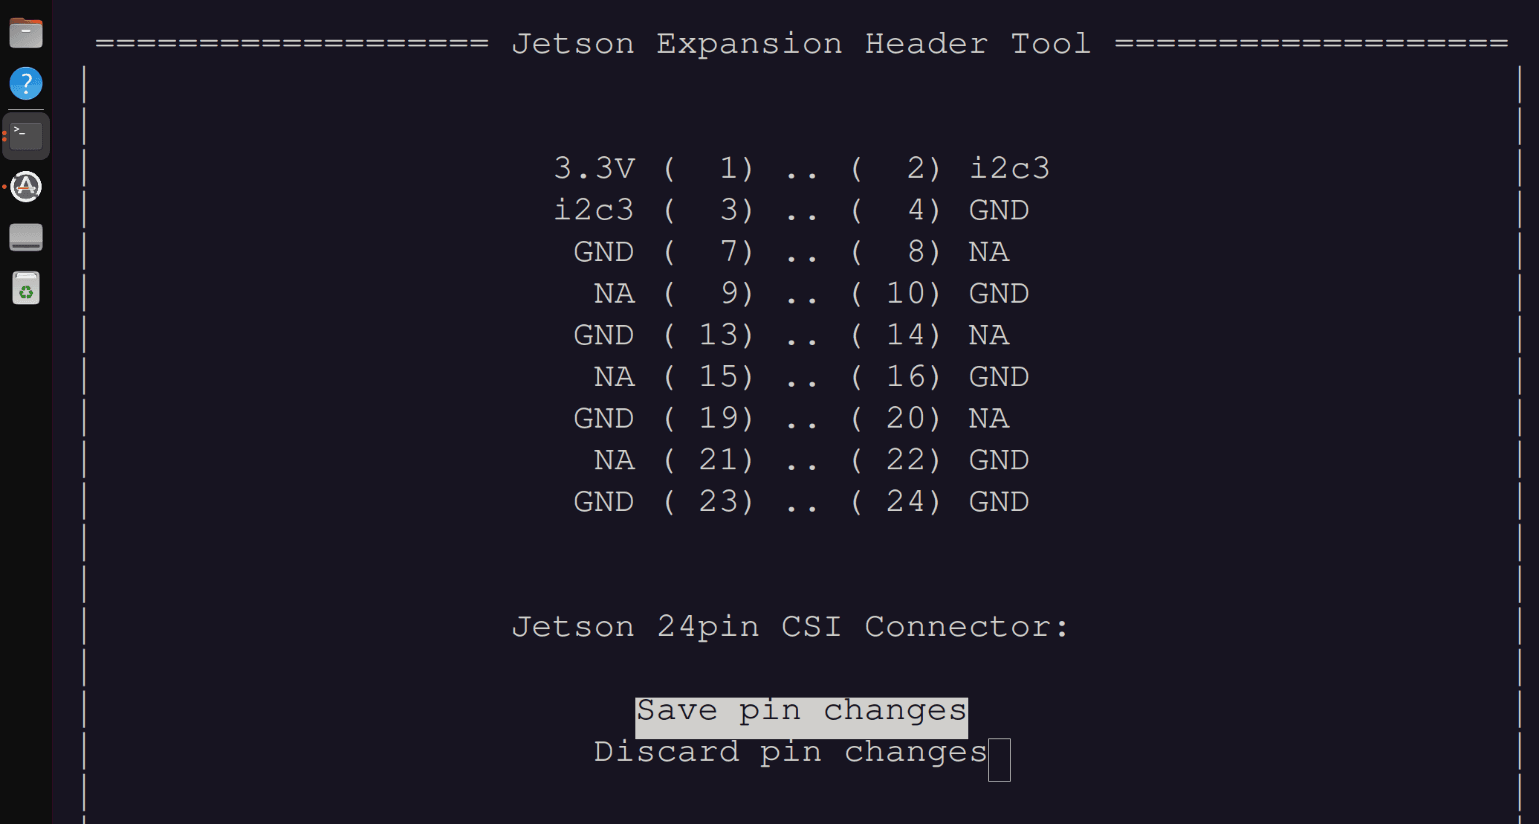
Select "Save pin changes":

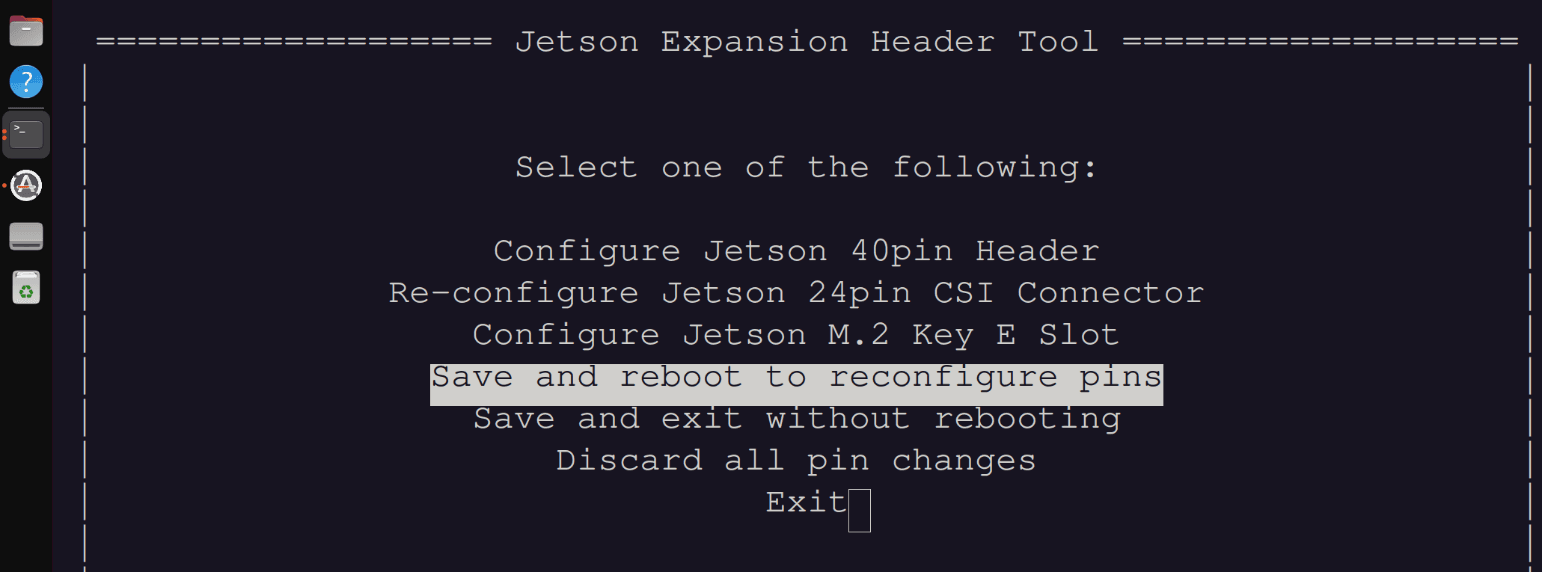
Select "Save and reboot to reconfigure pins":
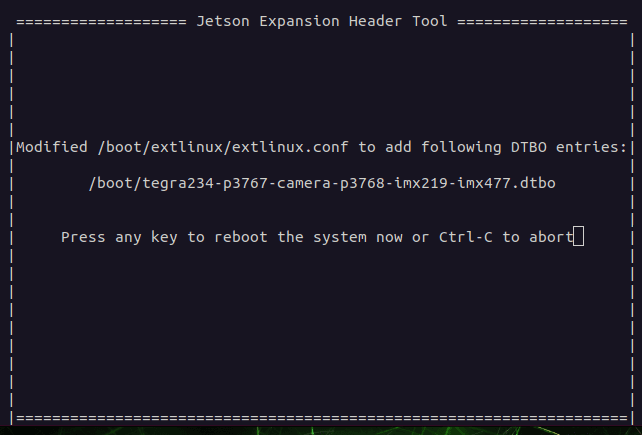
Step 13: Press Any Key to Reboot
The system will reboot and reconfigure the MIPI pins for both cameras.

Info
- The system will shut down and restart. This process typically takes 30-60 seconds.
