
Raspberry Pi 5 Image Bringup
This guide provides step-by-step instructions for setting up the Oppila integration package on a Raspberry Pi running the 64-bit Trixie (Debian 13) operating system. This configuration is required to establish a connection between the Raspberry Pi and the PAL–MIPI CSI-2 Bridge Board for video streaming.
The primary purpose of this procedure is to flash, configure, and initialize the Raspberry Pi with the OPPILA_RASP_TRIXIE_64_INTEGRATION_PM package to enable seamless video streaming.
This procedure applies specifically to Raspberry Pi devices running the 64-bit Trixie (Debian 13) image, configured with the OPPILA_RASP_TRIXIE_64_INTEGRATION_PM package, and connected to the bridge board using its assigned serial number.
Note
The setup procedure applies to analog PAL/NTSC CVBS cameras connected via composite video input.
System Architecture
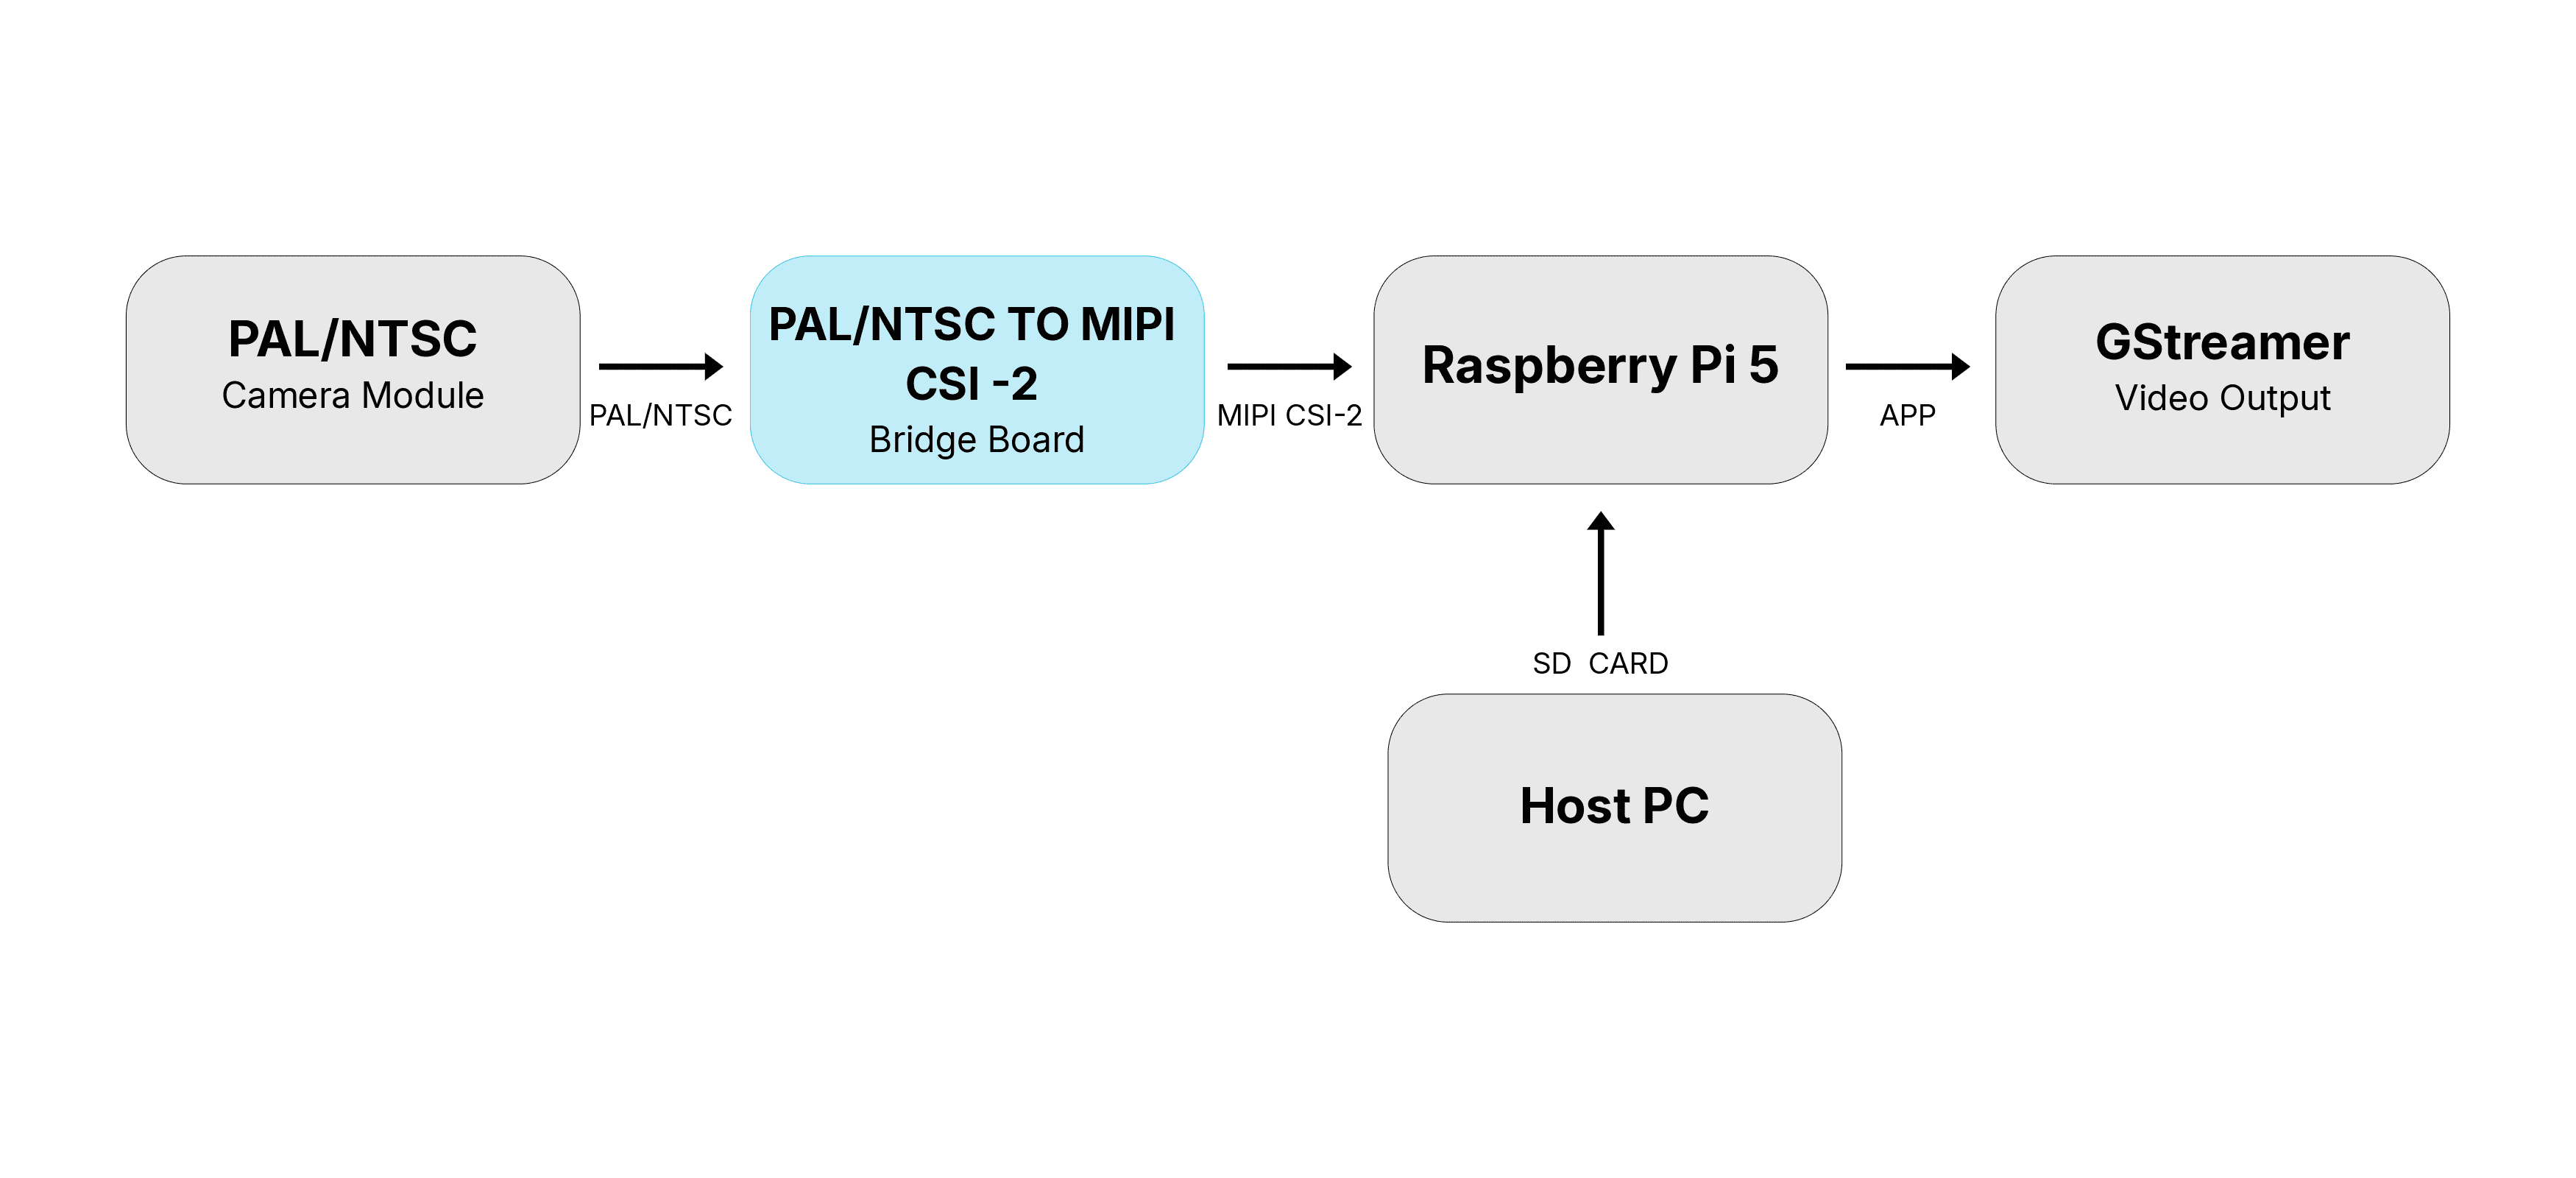
Host PC running Raspberry Pi Imager application flashes the 64-bit Trixie (Debian 13) OS image onto a MicroSD card.
Analog PAL/NTSC camera outputs composite video (CVBS) to the bridge board.
Bridge board converts PAL/NTSC analog video to MIPI CSI-2 and streams it to the Raspberry Pi 5.
Raspberry Pi 5 initializes the CSI bridge camera interface using the OPPILA_RASP_TRIXIE_64_INTEGRATION_PM package, and GStreamer reads and renders the video output.
Prerequisites
Before beginning this procedure, ensure the following requirements are met:
Required Files
Note
These files are not publicly available. Contact Oppila Support for the files.