
Raspberry Pi 5 Driver Configuration
Follow these terminal command steps to set up and configure the Oppila integration package.
Driver Installation & Configuration
Note
Contact Oppila Support Team for the
OPPILA_RASP_TRIXIE_64_INTEGRATION.zipfile.
Step 3: Log In and Open Terminal
Log in to your Raspberry Pi using your configured password. Open a terminal window using the keyboard shortcut:
Ctrl + Alt + T
Step 4: Download and Move the Integration Package
Download the OPPILA_RASP_TRIXIE_64_INTEGRATION.zip file and move to the home directory of Raspberry Pi 5.
Step 5: Extract the Package and Navigate to Directory
Extract the ZIP file and navigate into the extracted directory using the following commands:
unzip OPPILA_RASP_TRIXIE_64_INTEGRATION.zipcd OPPILA_RASP_TRIXIE_64_INTEGRATION/Warning
- Active Network Connection: Ensure your Raspberry Pi has an active network connection before running the setup script.
- Serial Number Accuracy: The serial number used in the setup command must match the bridge board serial number exactly.
Step 6: Run the Config Script
Execute the config script using the following command, replacing <serial_number> with your LVDS-MIPI CSI-2 bridge board serial number:
sudo ./config.sh <serial_number>Tip
You can find the serial number (for example:
1002) printed on the back of your bridge board.
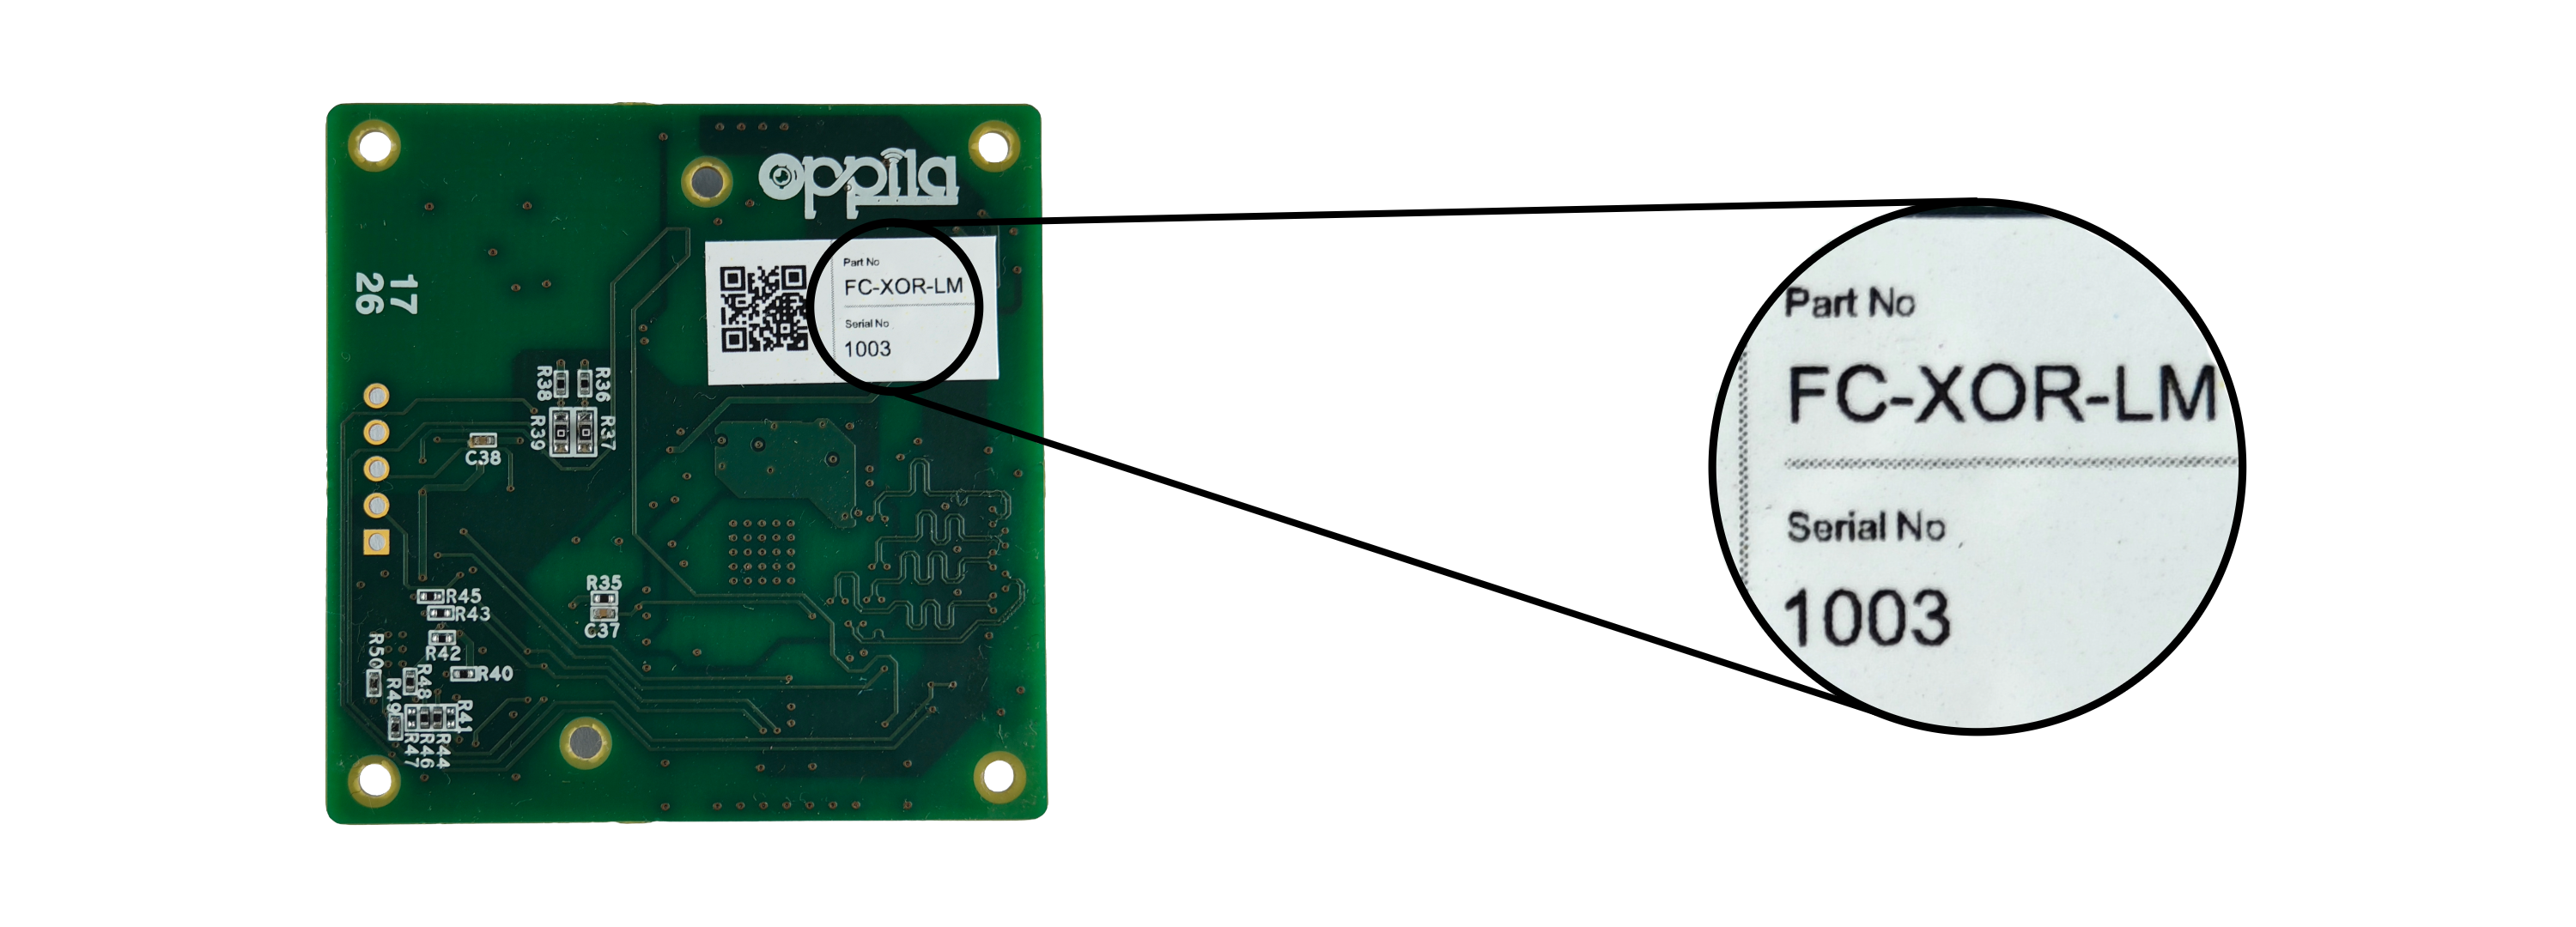
Info
The Raspberry Pi will reboot automatically after the script finishes executing.